Dulce de Leche Guide
Welcome to the ultimate Dulce de Leche Guide! I grew up in Brazil where dulce de leche is everywhere. Bakeries sell it by the tub. We fill cakes with it, sandwich it between cookies in classic alfajores, swirl it into brigadeiros, and yes — eat it straight from the spoon.
If you’ve ever wondered what dulce de leche actually is, how the cooking methods differ, why it behaves differently than caramel, or which method gives the thickest, darkest result… this guide will walk you through all of it.
Whether you grew up eating dulce de leche (like I did in Brazil) or you’re discovering it now, this guide will help you make a perfect batch every time and show you simple, delicious ways to use it.
This post may contain affiliate links. I earn a commission from qualified purchases. Please read our Privacy policy here.
What Is Dulce de Leche?
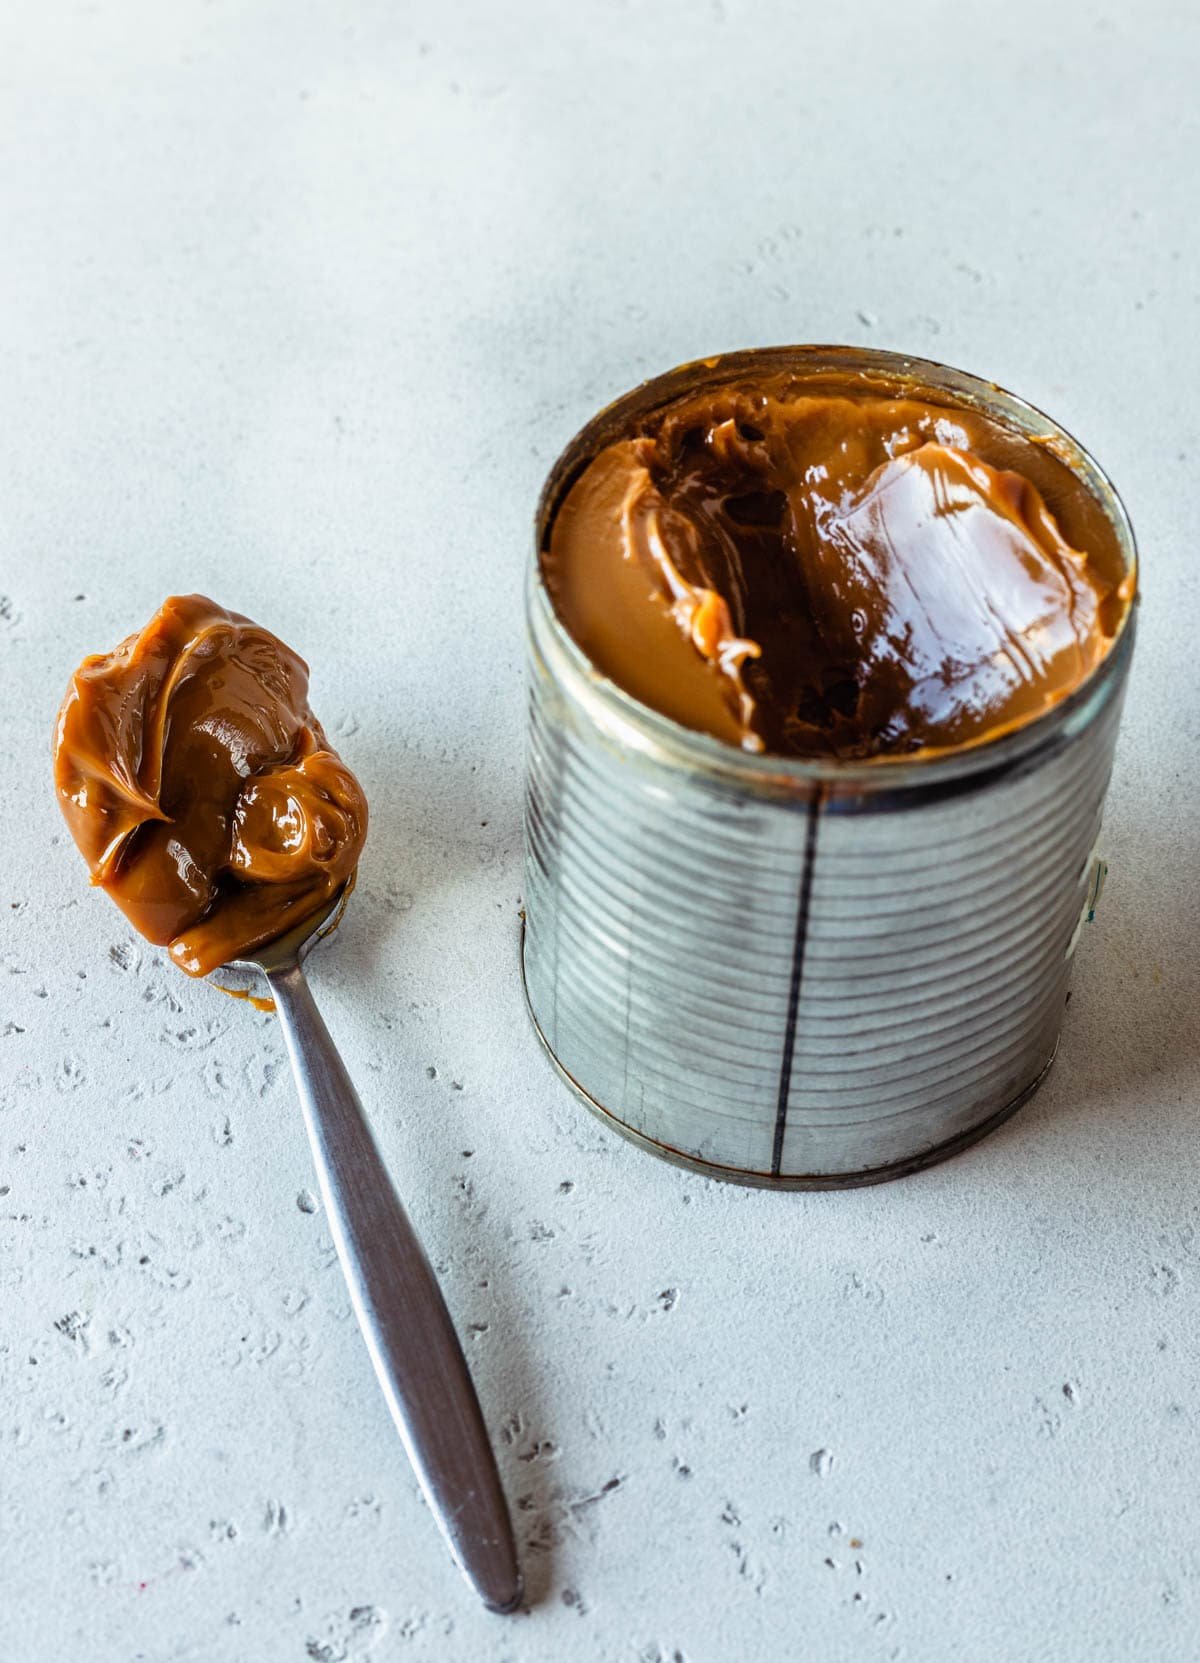
Dulce de leche is a thick, milk-based caramel made by slowly cooking milk and sugar until it becomes deeply golden, rich, and creamy.
It originated in Argentina but is widely popular across Latin America. In Brazil we call it doce de leite — literally “sweet milk.”
Dulce de Leche vs Caramel
Although both are delicious and similar, they are not the same. Caramel is made by melting sugar until it browns. Dulce de leche starts with milk and sugar (or sweetened condensed milk) and cooks low and slow until the milk sugars and proteins transform.
The result is a completely different flavor and texture—richer, thicker, and more fudge-like, with warm, toasty notes. Caramel is lighter, thinner in consistency, and made in a fraction of the time.
Flavor difference between caramel and dulce de leche
- Caramel: sharper, sweeter, more one-dimensional.
- Dulce de leche: deeper, toastier, creamier.
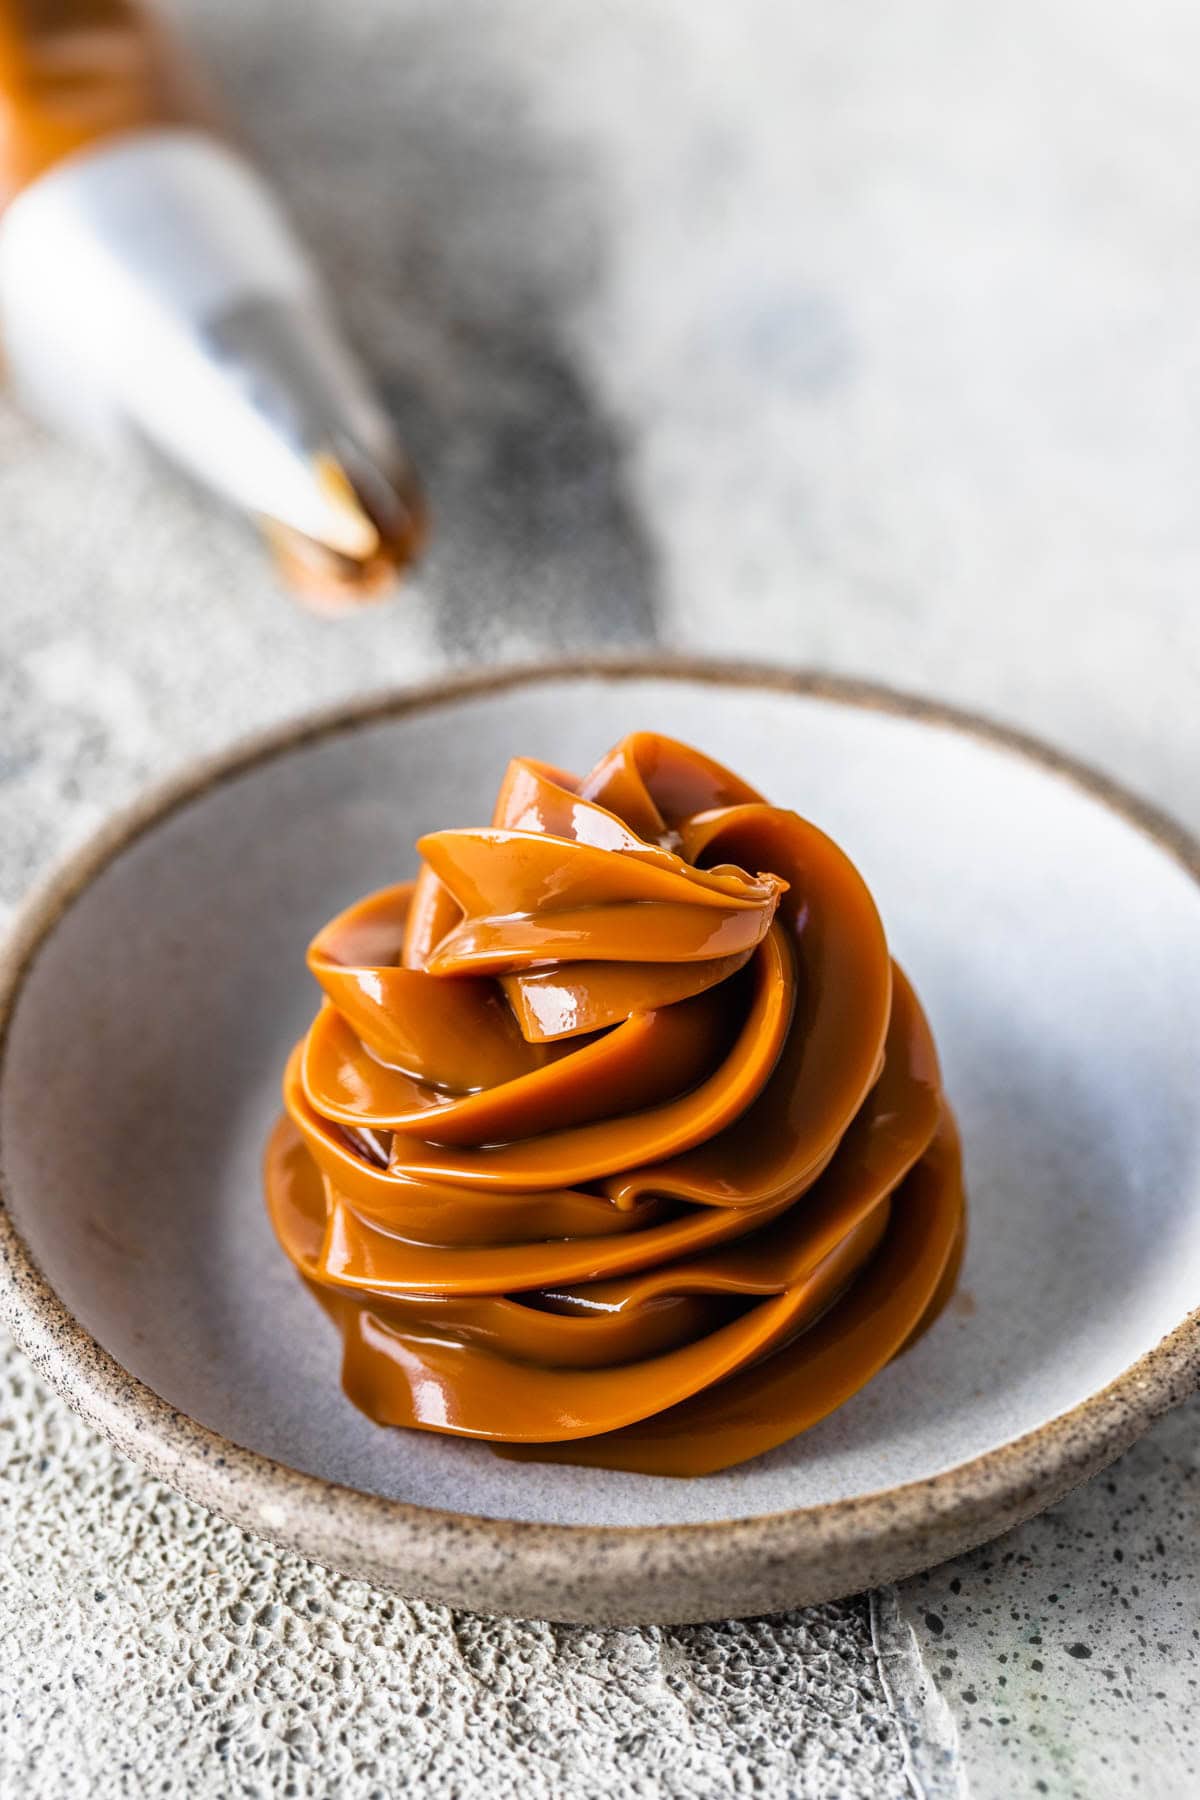
The milk proteins create complexity that caramel simply doesn’t have. The longer dulce de leche cooks, the darker, thicker, and more intense it becomes. You can control the cook time in order to make a really thick dulce de leche and rich in flavor. I will discuss dulce de leche repostero below, which is the really thick kind we use to pipe in cookie fillings, cakes, etc.
Why It Behaves Differently in Baking
Because dulce de leche contains milk solids, it thickens differently than caramel.
- It holds structure when thick enough and I love using it to fill things like macarons and cookie sandwiches because it won’t leak as caramel would.
- Doesn’t harden like caramel—stays scoopable.
- Stays creamy even when chilled.
- Freezes without becoming rock solid. I love literally scooping a little dulce de leche and eat it from the freezer whenever I have some in there.
That makes it ideal for fillings, frostings, macarons, alfajores, and cheesecakes. One of my favorite cheesecakes is of course this Dulce de Leche Cheesecake.
Whenever I make these alfajores (which happens a few times a year), I always freeze a batch—they’re perfect straight from the freezer, since neither the cookies nor the dulce de leche hardens completely.
Core Ingredients
Traditional dulce de leche is simple, just milk and sugar. But I frequently use the shortcut version, which is just a can of sweetened condensed milk. That’s actually my favorite way to make dulce de leche.
There is also a stovetop method made with milk, sugar, and baking soda. If you want that version, you can read it here in this post: dulce de leche without sweetened condensed milk.

How to make dulce de leche?
Like I said above, dulce de leche is made of sweetened milk, cooked down until Maillard reaction occurs between the sugar and milk.
The byproducts of the Maillard reaction are the complex flavors and aromas and the caramelization.
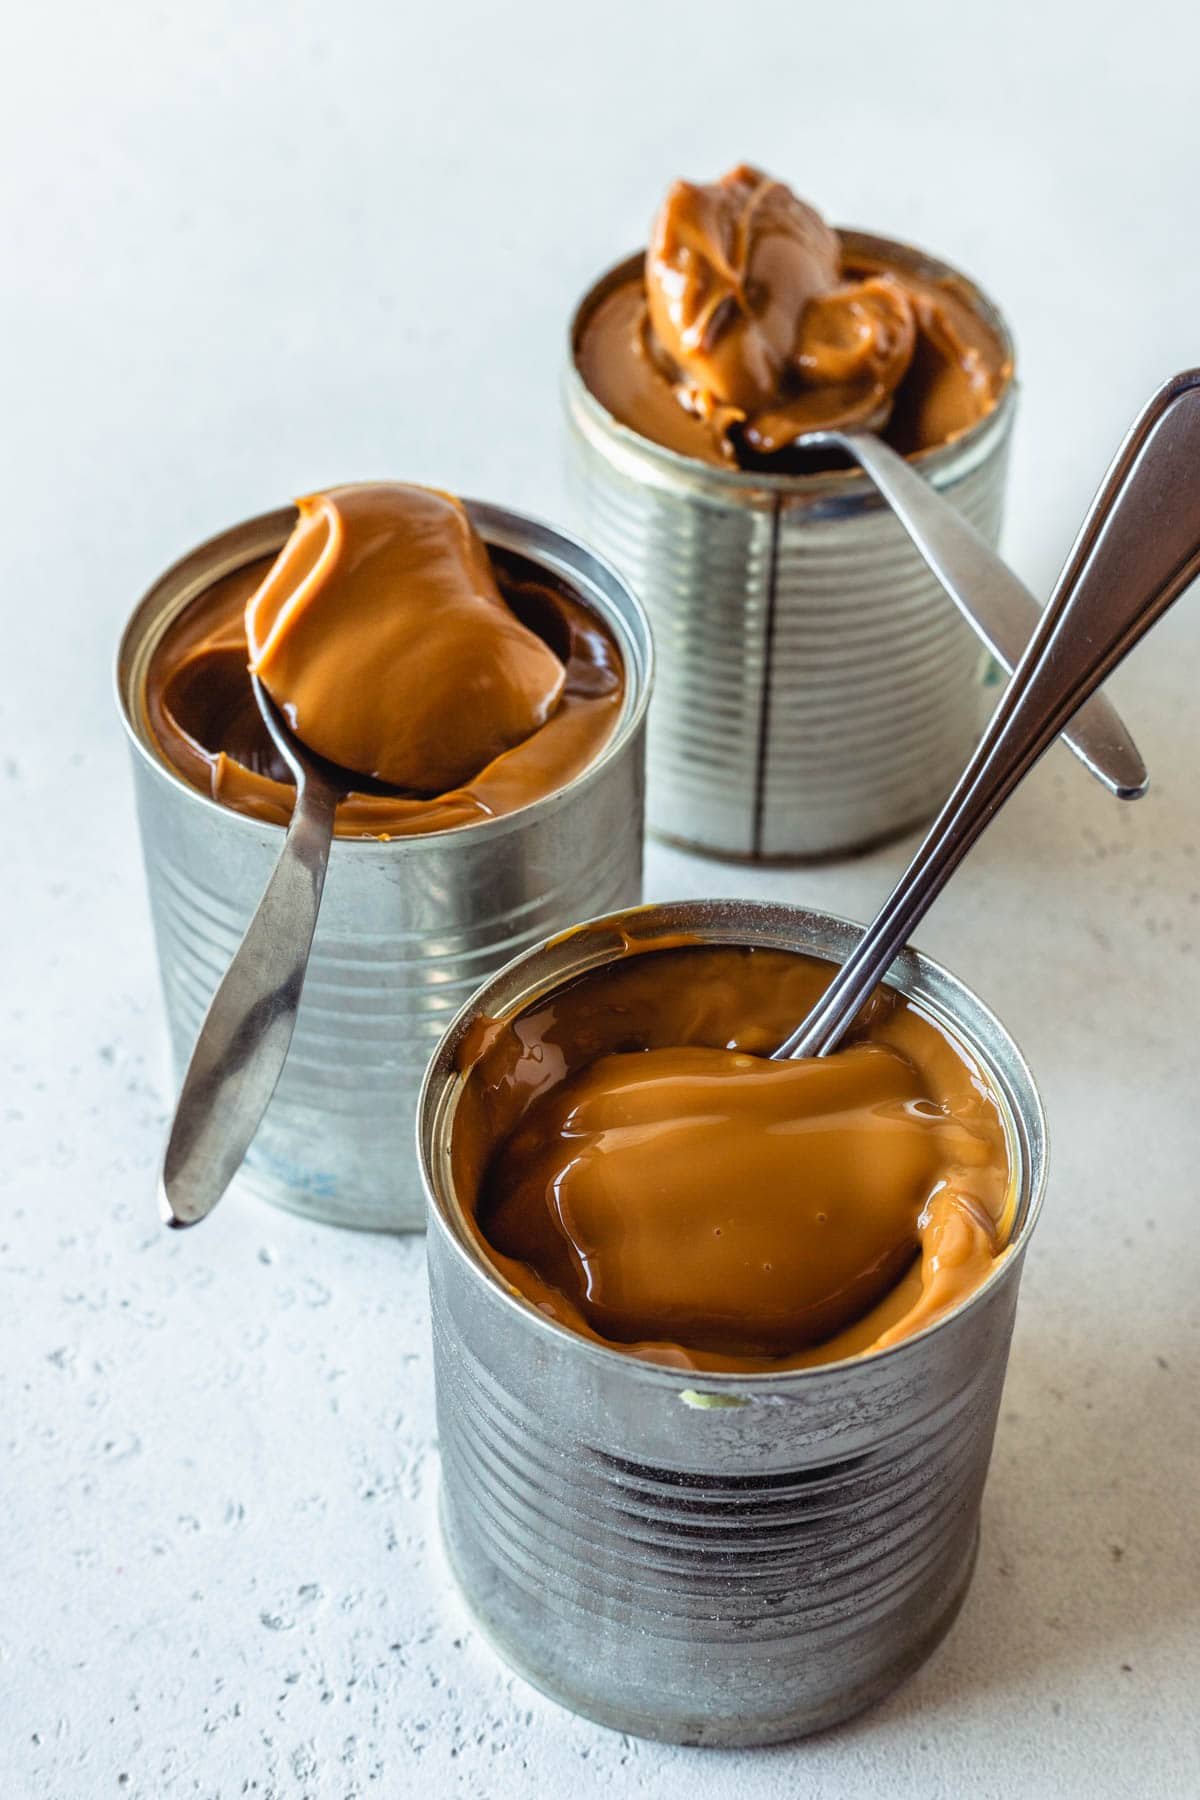
But basically, what you have to understand is that: the longer you cook, the darker and the thicker the dulce de leche will be. However, each method has its own cooking time in order to achieve the really thick and rich results.
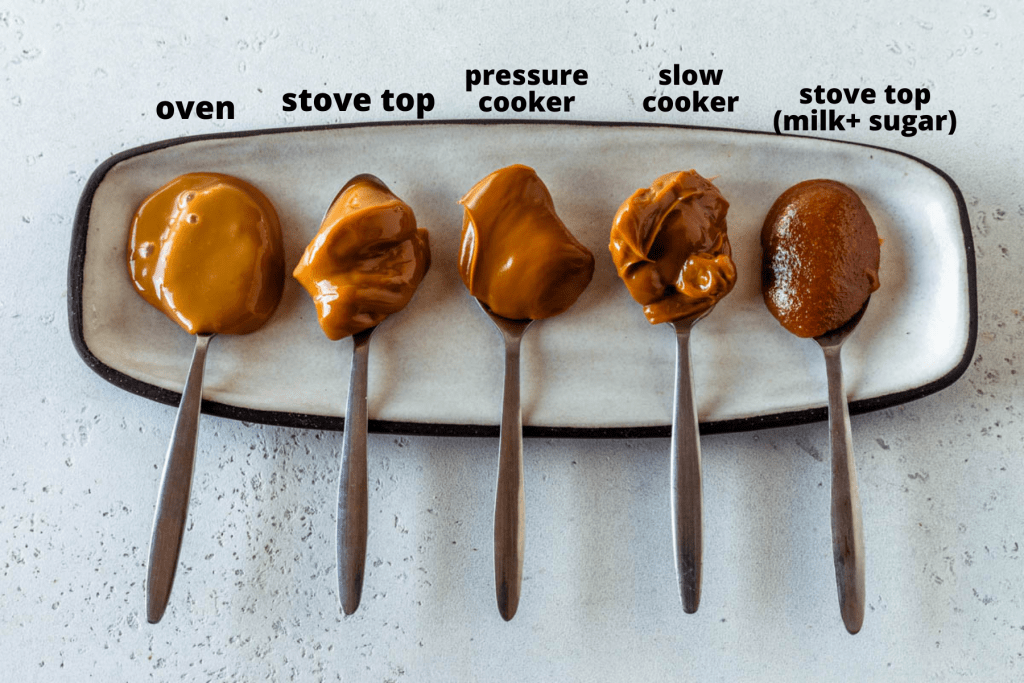
Let’s talk about the methods. On this video on YouTube, I am comparing the 5 different methods.
Choosing a Method
There isn’t one “right” method to make this delicious treat, and you can pick one that gives you the texture and depth you want. Here are the main options.
Oven Method
In the oven method, essentially, you take a can of sweetened condensed milk, spread it out in a baking pan, place it in a water bath, and bake it for a long time.
Check out here the recipe for the oven method dulce de leche.
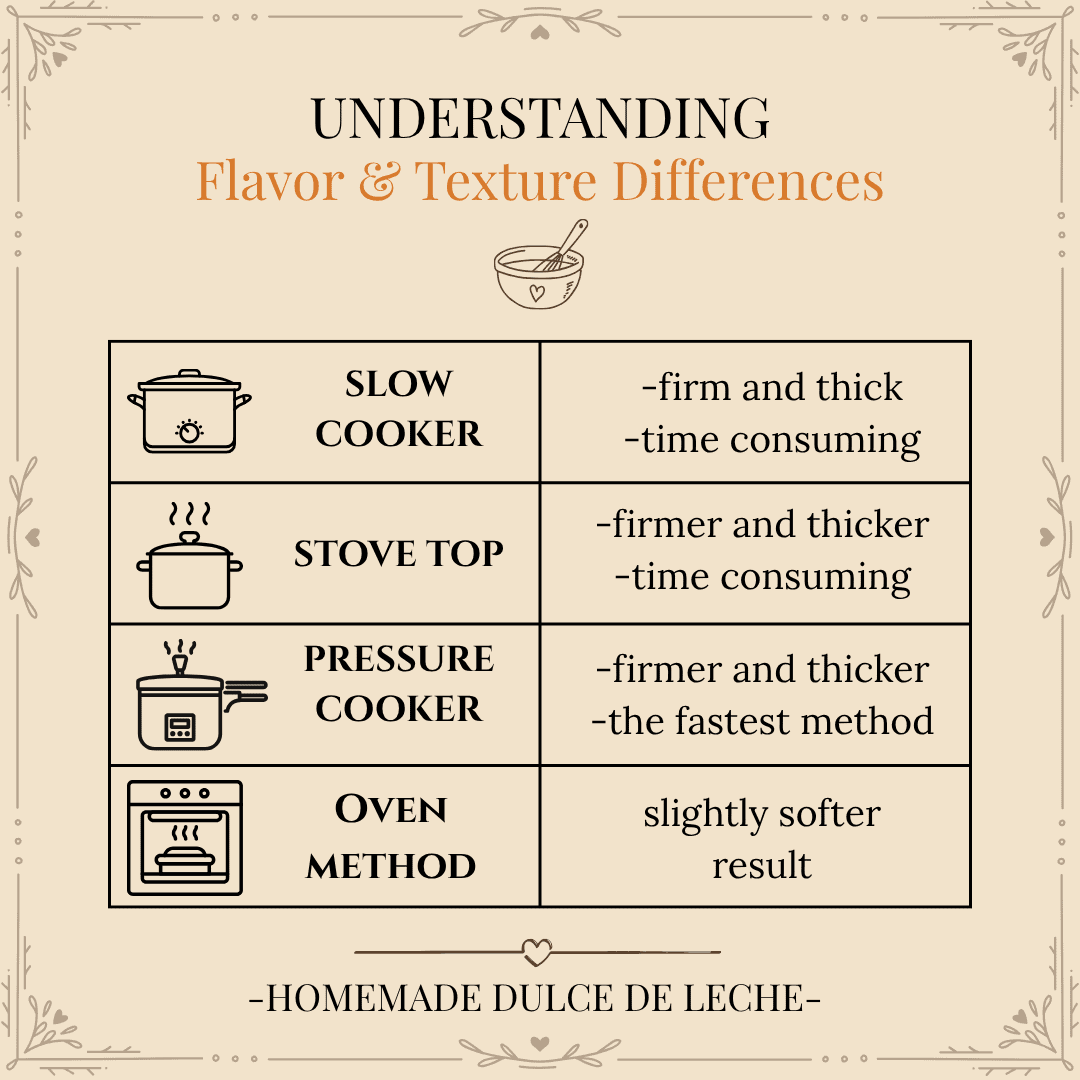
Pros and Cons
Pros:
- Very safe
- Controlled
- Great beginner method
Cons:
- Harder to get very dark
- Slightly less thick
- Can be a bit lumpy
Best for: general use, drizzling, spreading. Perfect for Dulce de Leche Apple Cake.
It’s a safe, reliable way to make dulce de leche, but the texture tends to be a little lumpy and not as thick, since you can’t let it cook too long without risking scorching. It works well for general use, but it won’t always give you the ultra-smooth consistency you’d want for frosting or glaze.
Stove Top (Simmering the Can)
This stove top method uses a sealed can of sweetened condensed milk simmered in a large pot or heavy-bottomed saucepan for several hours. The can must stay fully submerged the entire time, so you’ll need to check periodically and add hot water as needed. After cooking, let the can cool completely before handling or opening it.
The result is a thick, dark, deeply flavored dulce de leche. The longer it simmers—typically anywhere from 2½ to 4 hours—the darker and firmer it becomes. As long as you keep the can fully covered with water and at a gentle simmer, this method produces a consistently rich, caramelized result.
Pros and Cons
Pros:
- Deep flavor
- Thick texture
- Reliable
Cons:
- Needs supervision
- Must keep the can submerged at all times
Best for: thick fillings and richer color. Try it in frostings or in these Dulce de Leche Donuts.

Instant Pot (Pressure Cooker) – My Favorite
This method gives the most consistent results, so obviously it’s my favorite, but it can seem daunting to put a sealed metal can in a pressure cooker. It only takes 35 minutes plus the 15 it takes to release pressure naturally, plus cooling time. But as far as cooking time goes, this is the fastest, and most energy-efficient.
I’ve had no issues with it thus far, but I understand if you don’t want to go this route! To prevent accidents, don’t jostle or move the pan around while the can of sweetened condensed milk is in there cooking. Inspect the can prior to boiling it to ensure there are no dents. And also, make sure to fully submerge it in water. And only remove the can once the pressure has been released naturally and the water has cooled down slightly. Don’t open the can until it has cooled down completely (as with the other methods as well.)
Pros and Cons
Pros:
- Deep, dark color
- Thick and smooth
- Faster than stovetop
Cons:
- Requires a pressure cooker
- Make sure to inspect the can and not move the pressure cooker around while it’s cooking
This is the method I use most often when I need it for macarons or cake fillings.
Slow cooker method
In the slow cooker method, you also cook a sealed can of condensed milk, but this time in the slow cooker, for 8 hours, and always making sure the can is completely cooled down before moving it and opening.
Pros and Cons
Pros:
- Very hands-off
- Thick result
Cons:
- Takes a long time
Great if you want to set it and forget it.
My advice is, if you are going to make your own dulce de leche, go with the instant pot/pressure cooker method. Just make sure to inspect the can for dents before making.
Understanding the Cooking Process
Here’s what’s actually happening while it cooks.
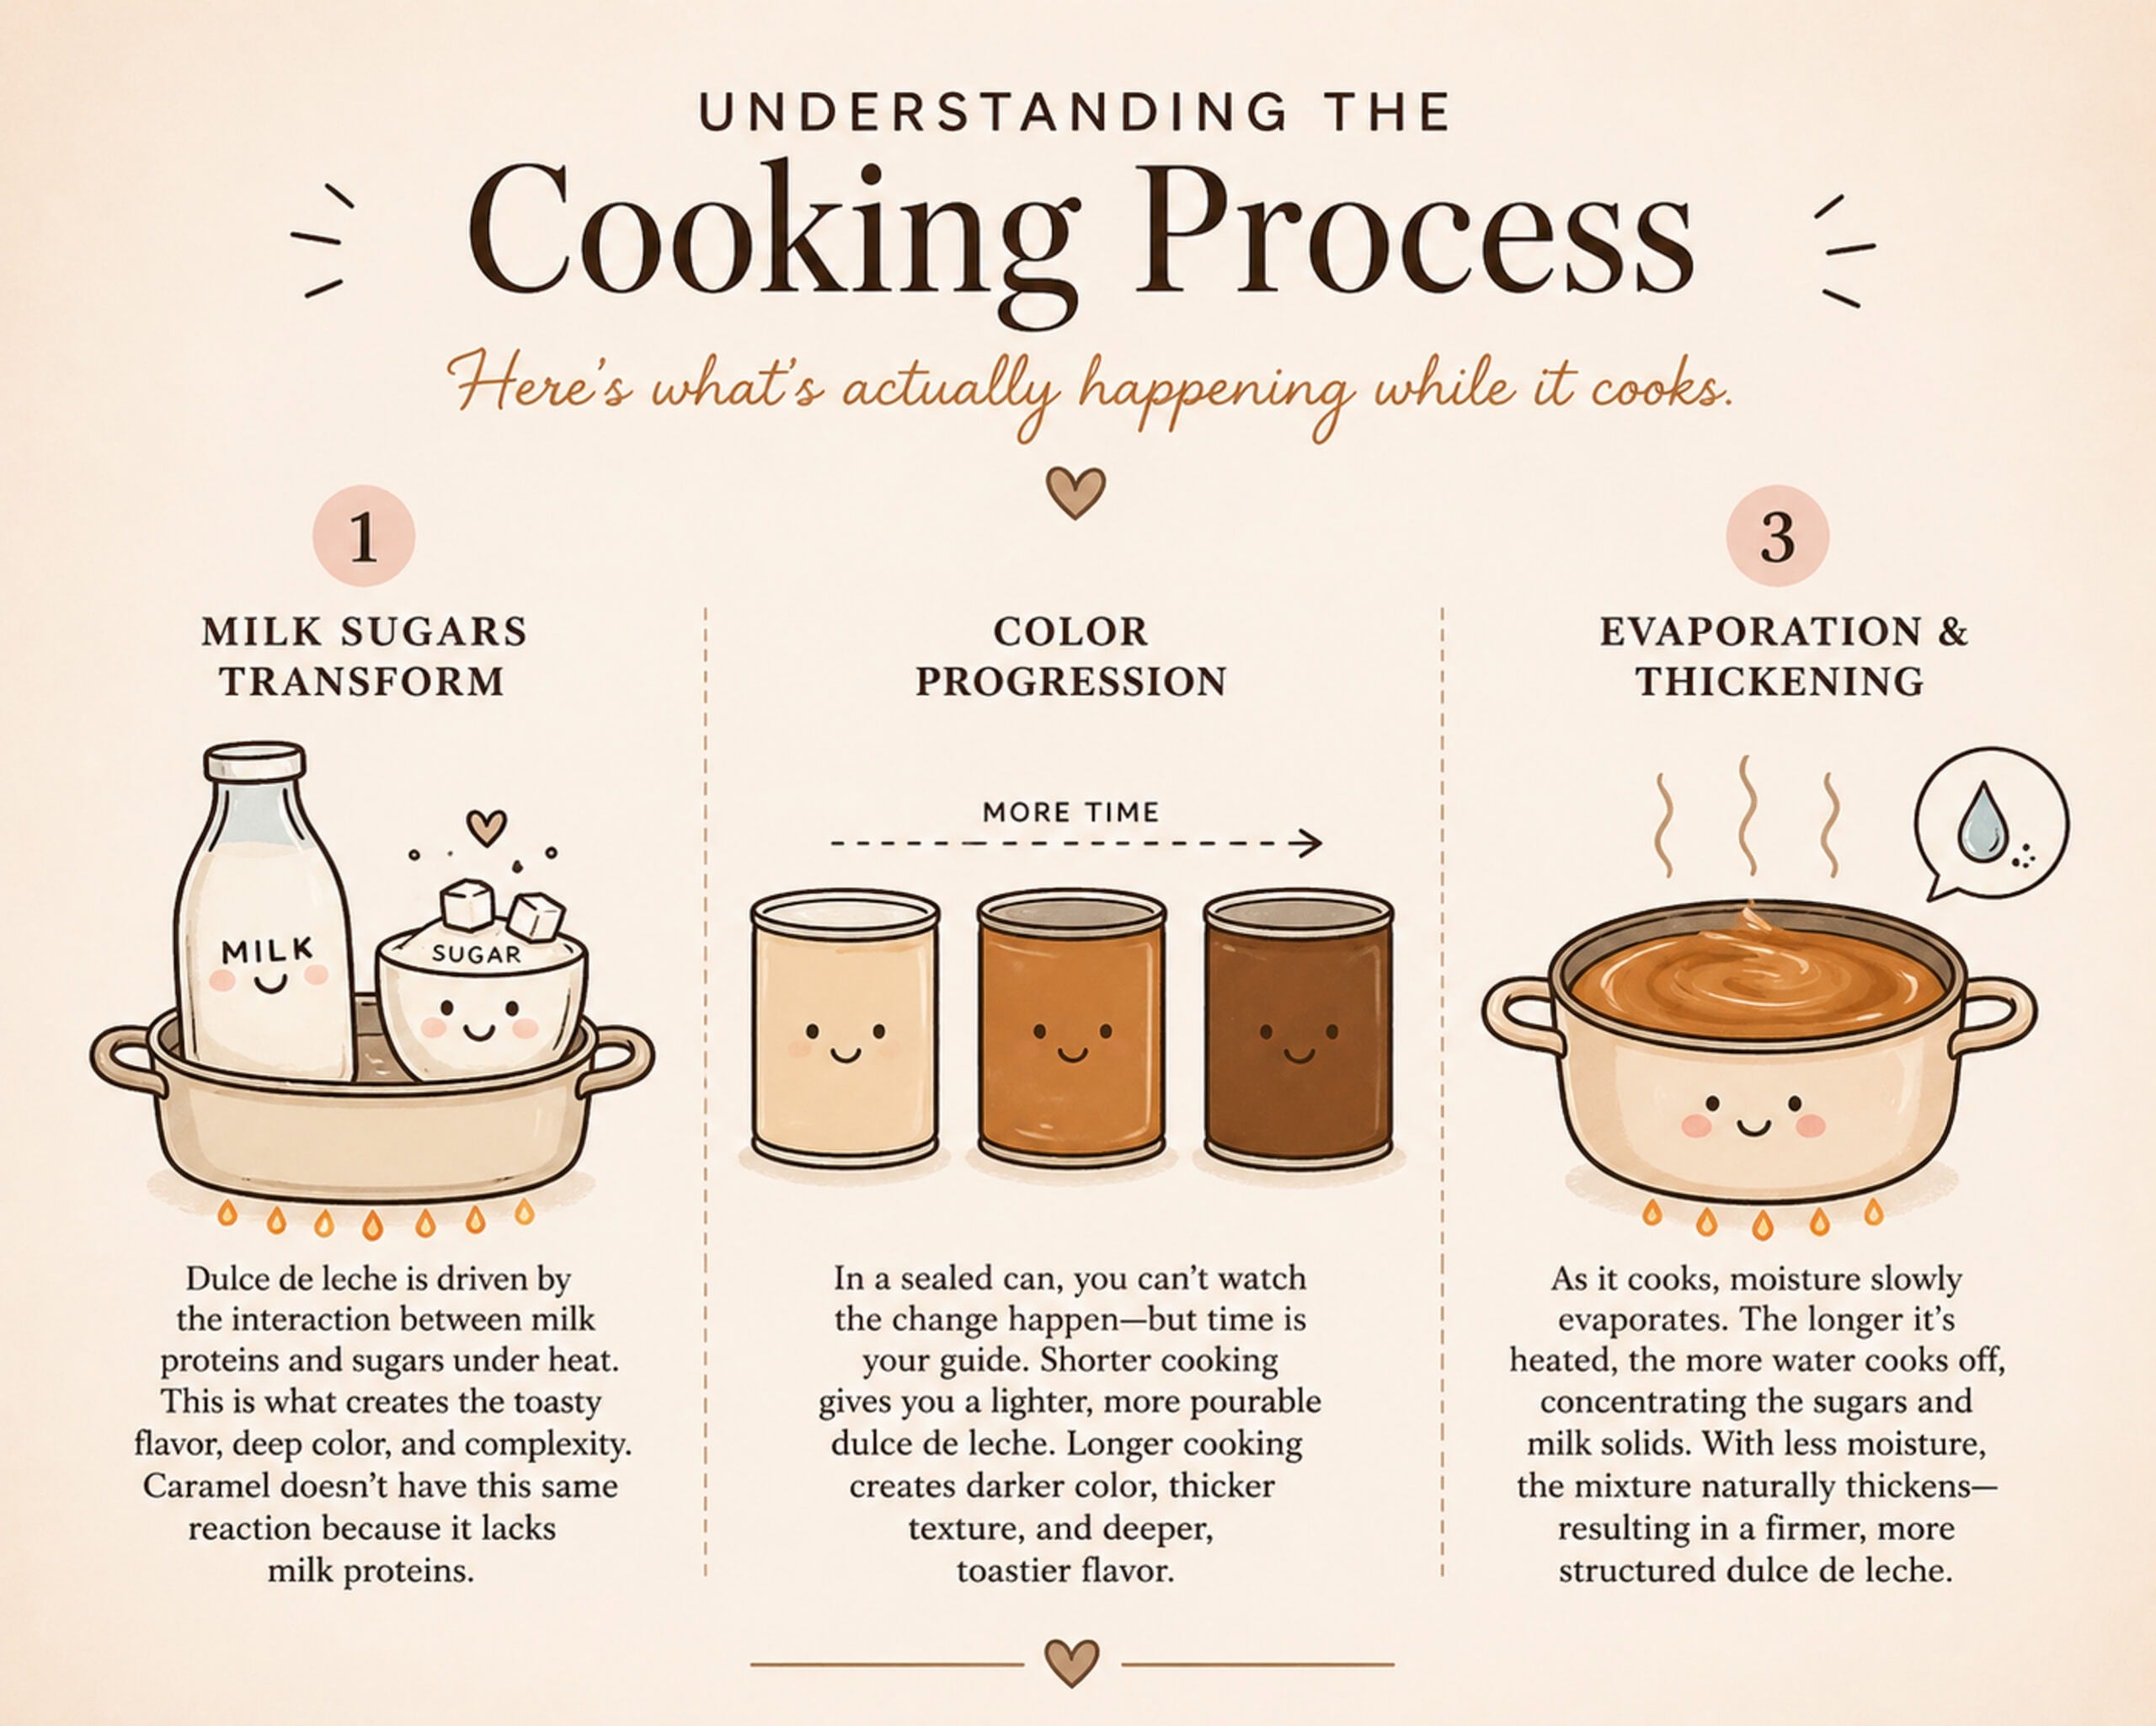
1. Milk Sugars Transform
Dulce de leche is driven by the interaction between milk proteins and sugars under heat.
This is what creates the toasty flavor, deep color, and complexity. Caramel doesn’t have this same reaction because it lacks milk proteins.
2. Color Progression
When you’re cooking dulce de leche in a sealed can, you won’t be able to watch the color change in real time. Instead, the transformation happens quietly inside, and time becomes your guide. A shorter cooking time will give you a lighter, more pourable dulce de leche, while a longer cooking time produces a darker color, thicker texture, and deeper, toastier flavor. Even though you can’t see the progression as it happens, it’s still moving through those same stages — becoming richer and more concentrated the longer it cooks.
3. Evaporation & Thickening
As dulce de leche cooks, moisture slowly evaporates. The longer it’s heated, the more water cooks off, which concentrates the sugars and milk solids. With less moisture, the mixture naturally thickens — that’s why longer cooking times result in a firmer, more structured dulce de leche.
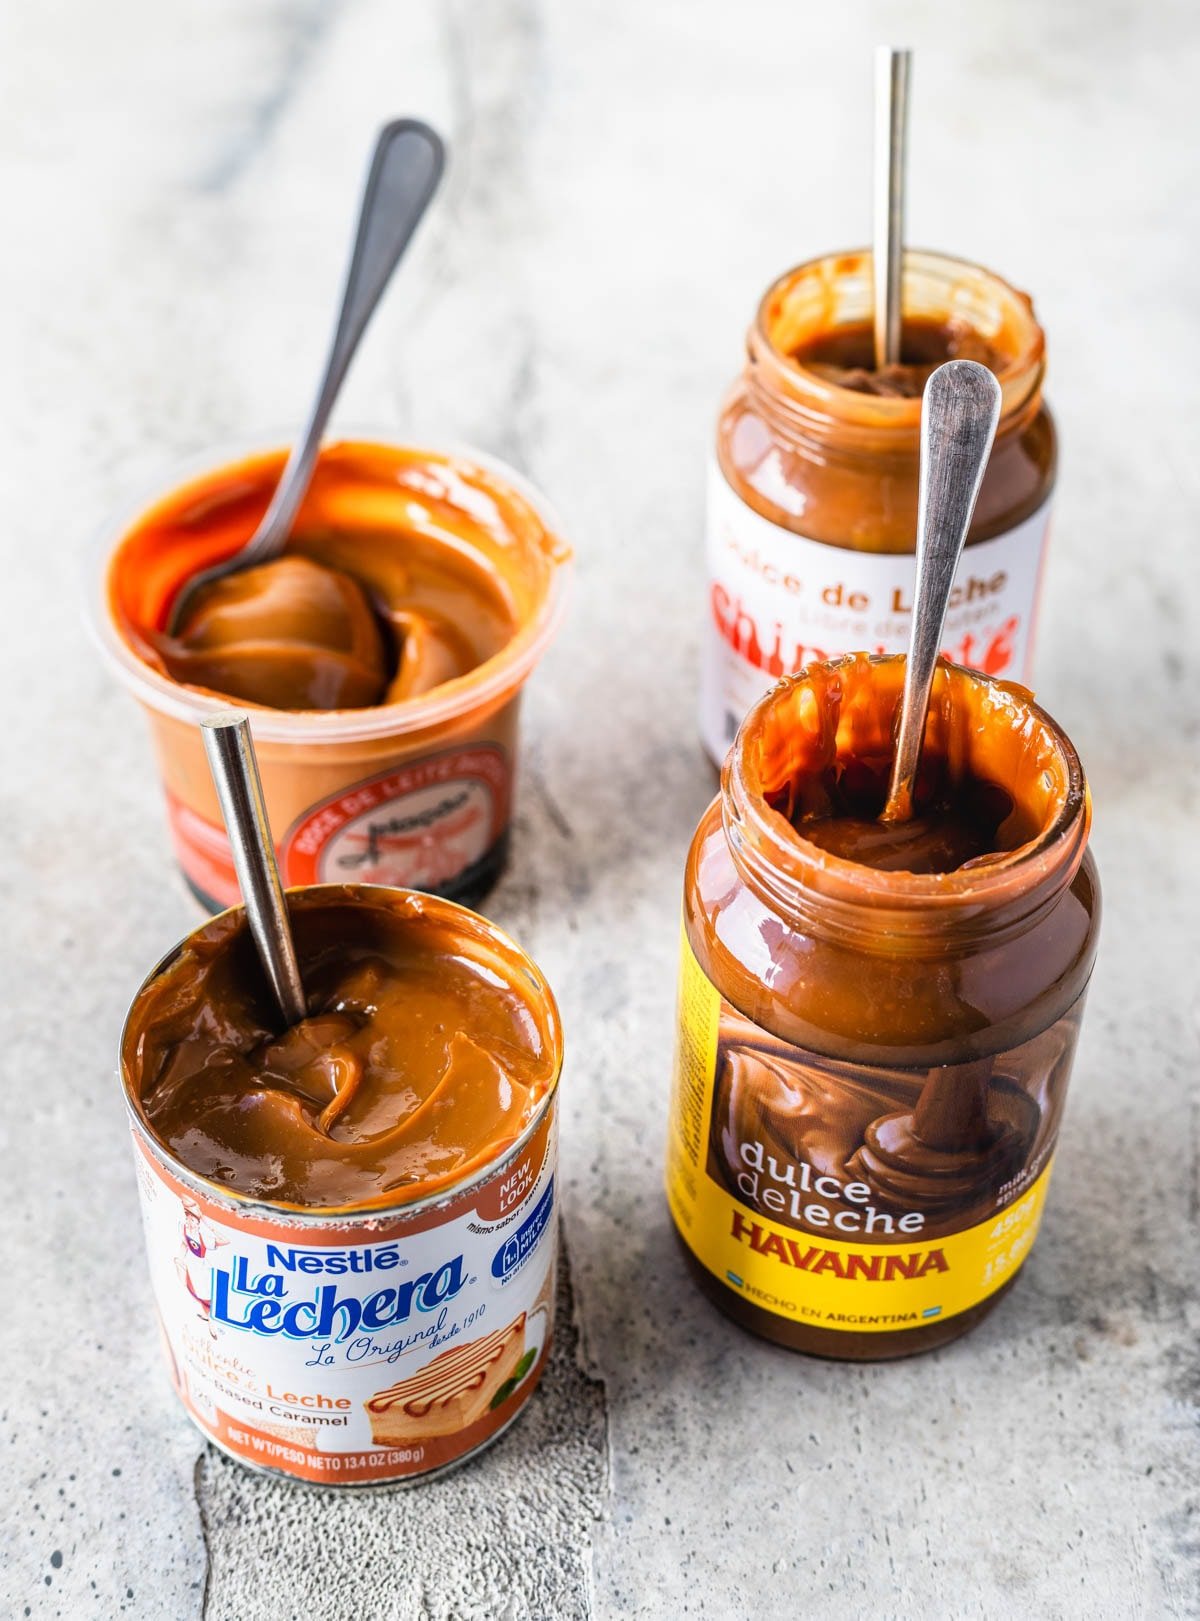
Where to Buy Dulce de Leche
Dulce de leche is much easier to find in the US now than it used to be. You can usually spot it near the sweetened condensed milk, in the Latin foods aisle, or online if your local store doesn’t carry it. If you’re looking for one specifically for pastry work, choose dulce de leche repostero or repostería — it’s thicker, firmer, and designed for piping and filling. And truly, if you don’t feel like making it at home, there are some excellent store-bought versions that work beautifully in baking.
Dulce de Leche Repostero
A thicker, more stable version of dulce de leche made for baking and filling—it holds its shape instead of running. You can find it at Latin markets or online; common brands include La Serenísima, San Ignacio, and Cachafaz.
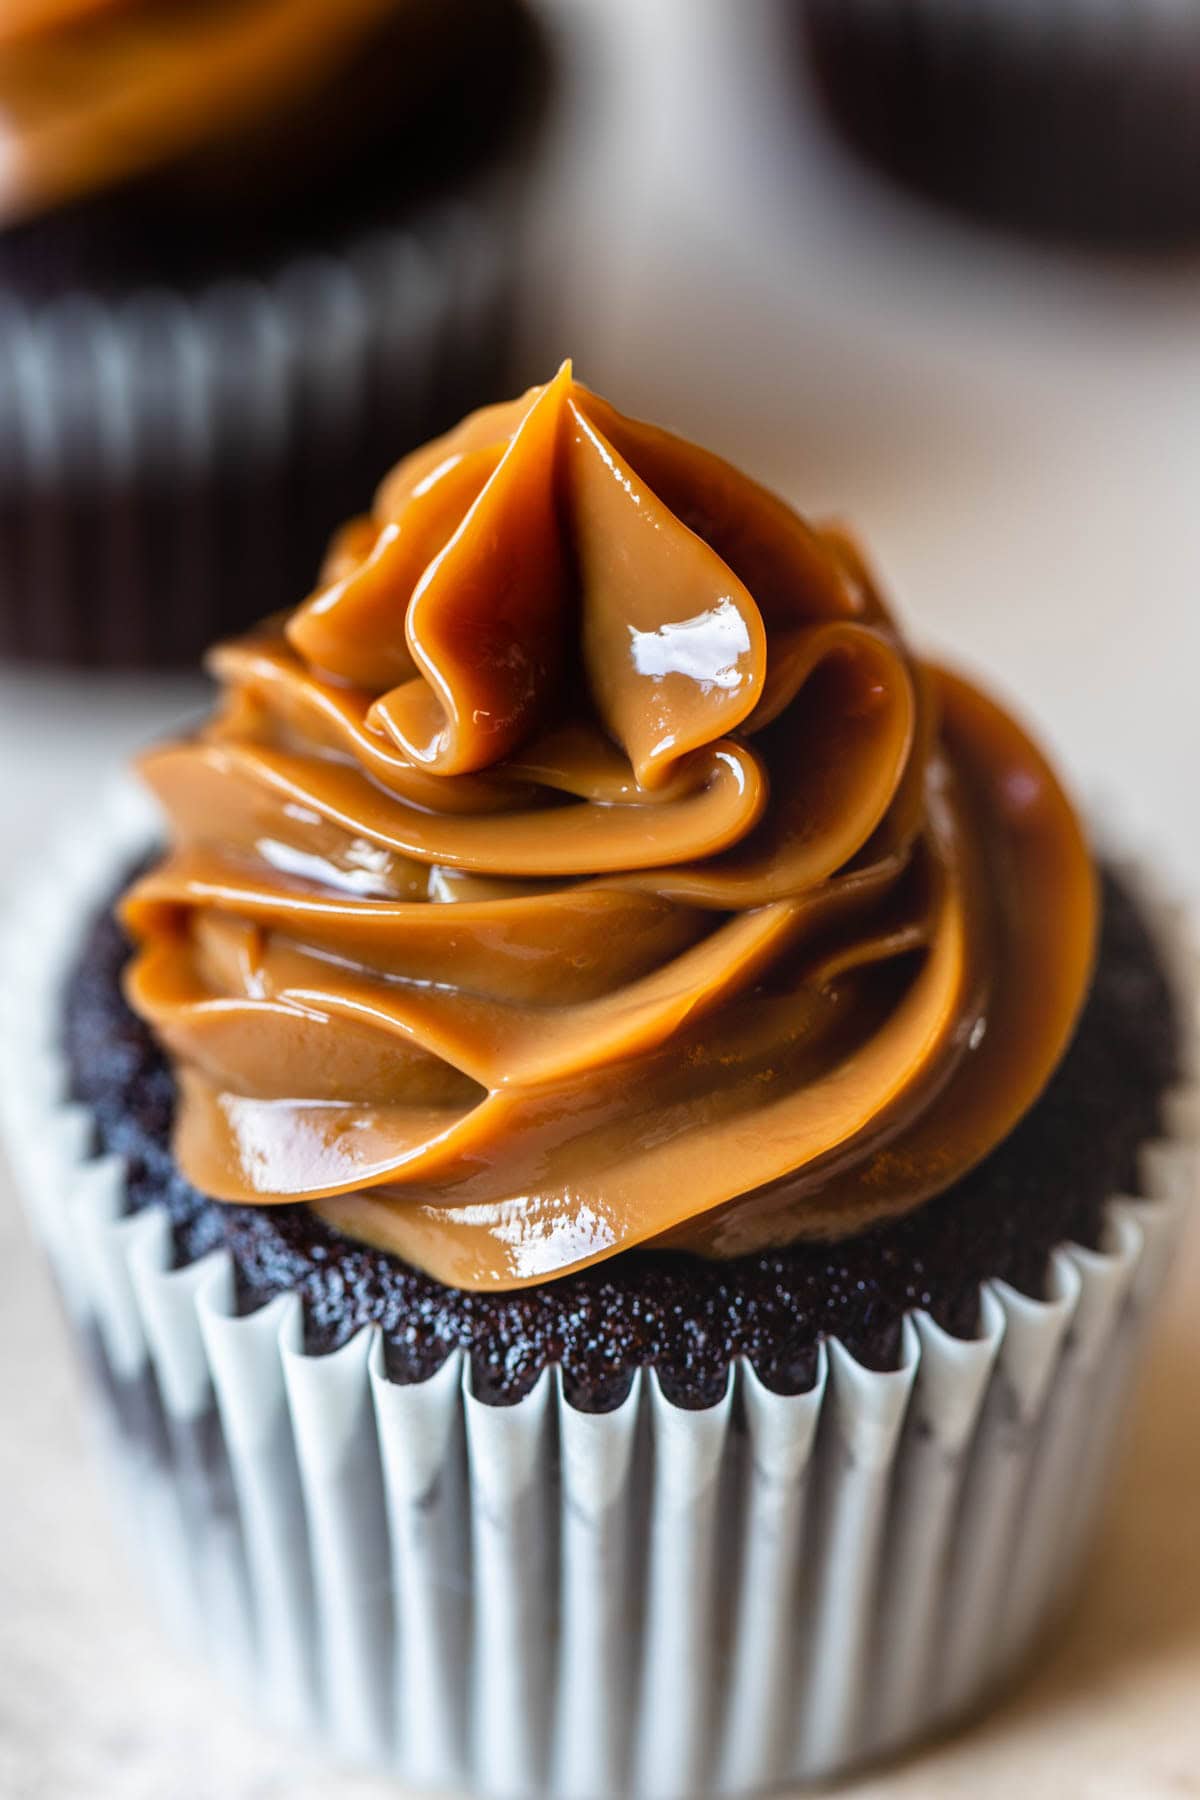
What to Do With Dulce de Leche
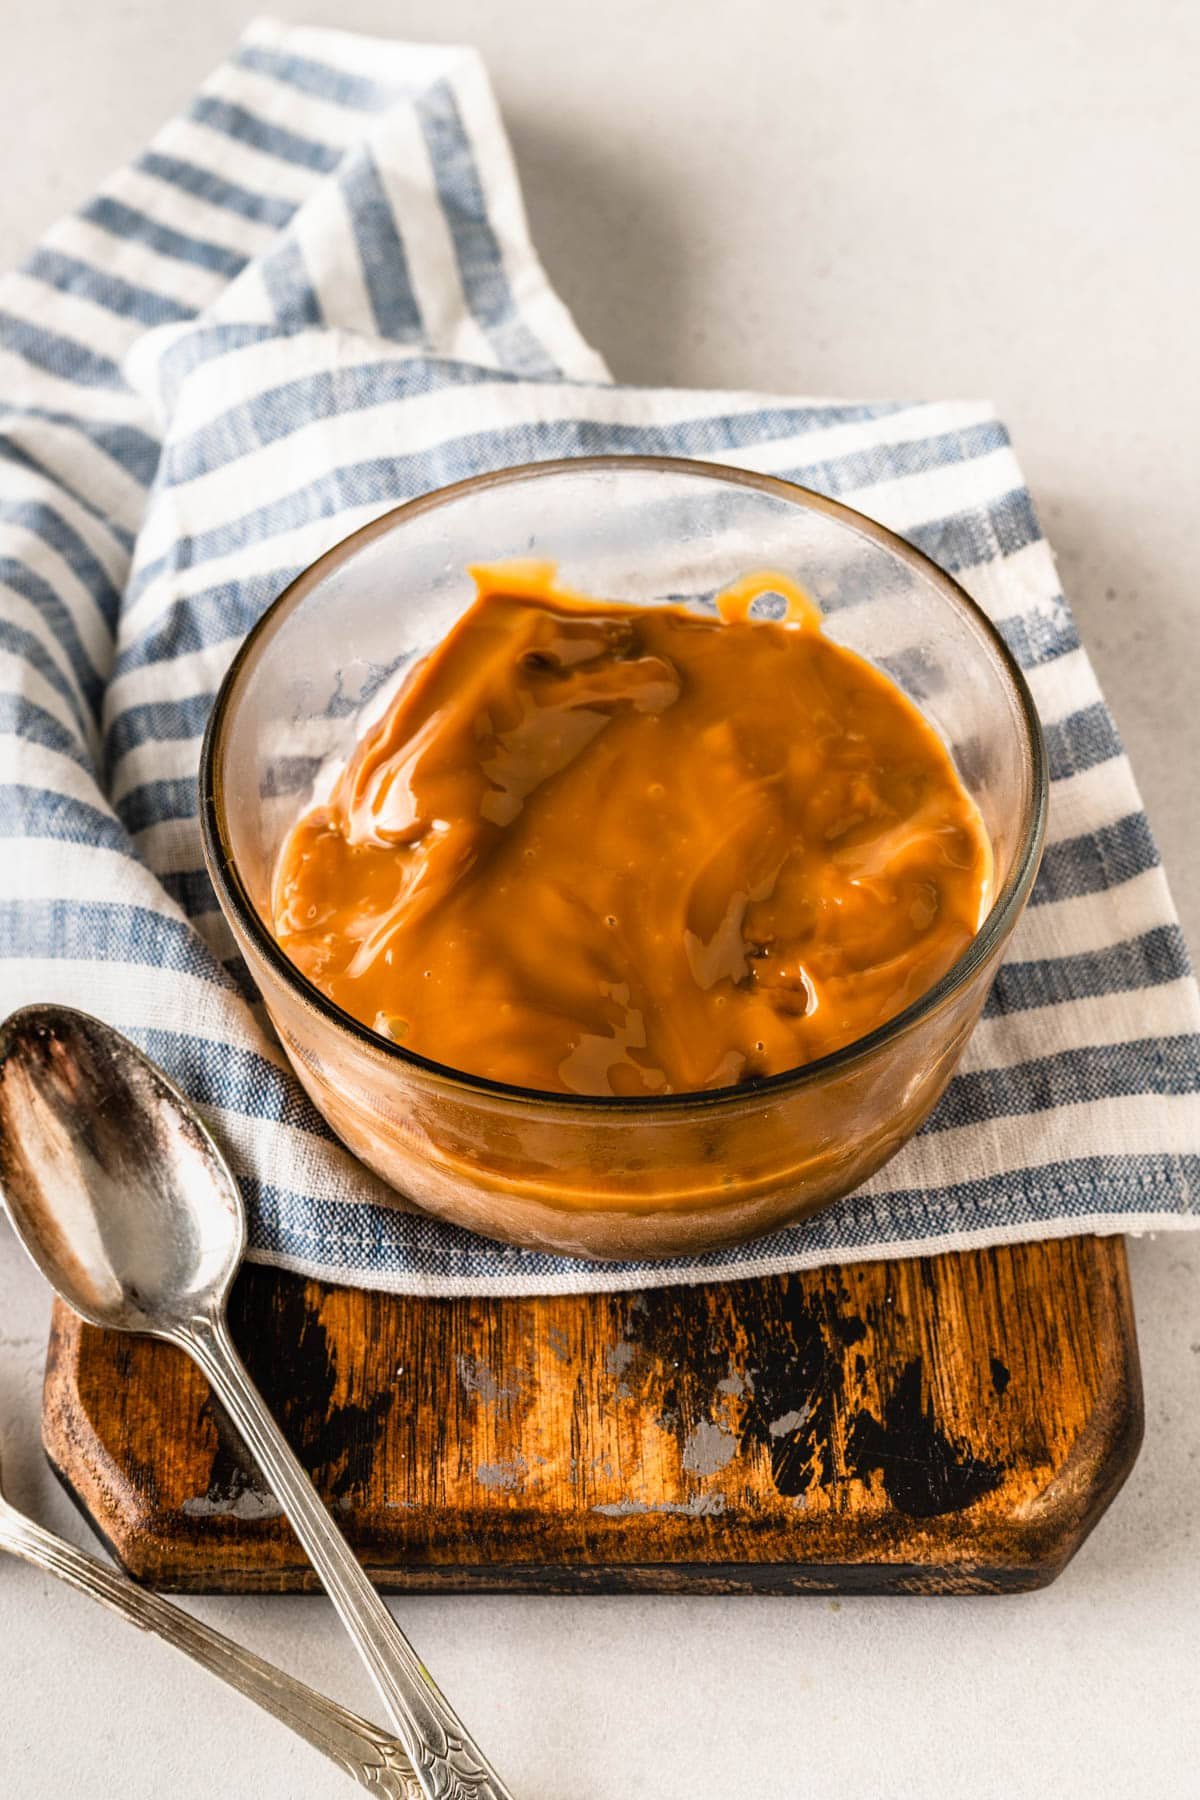
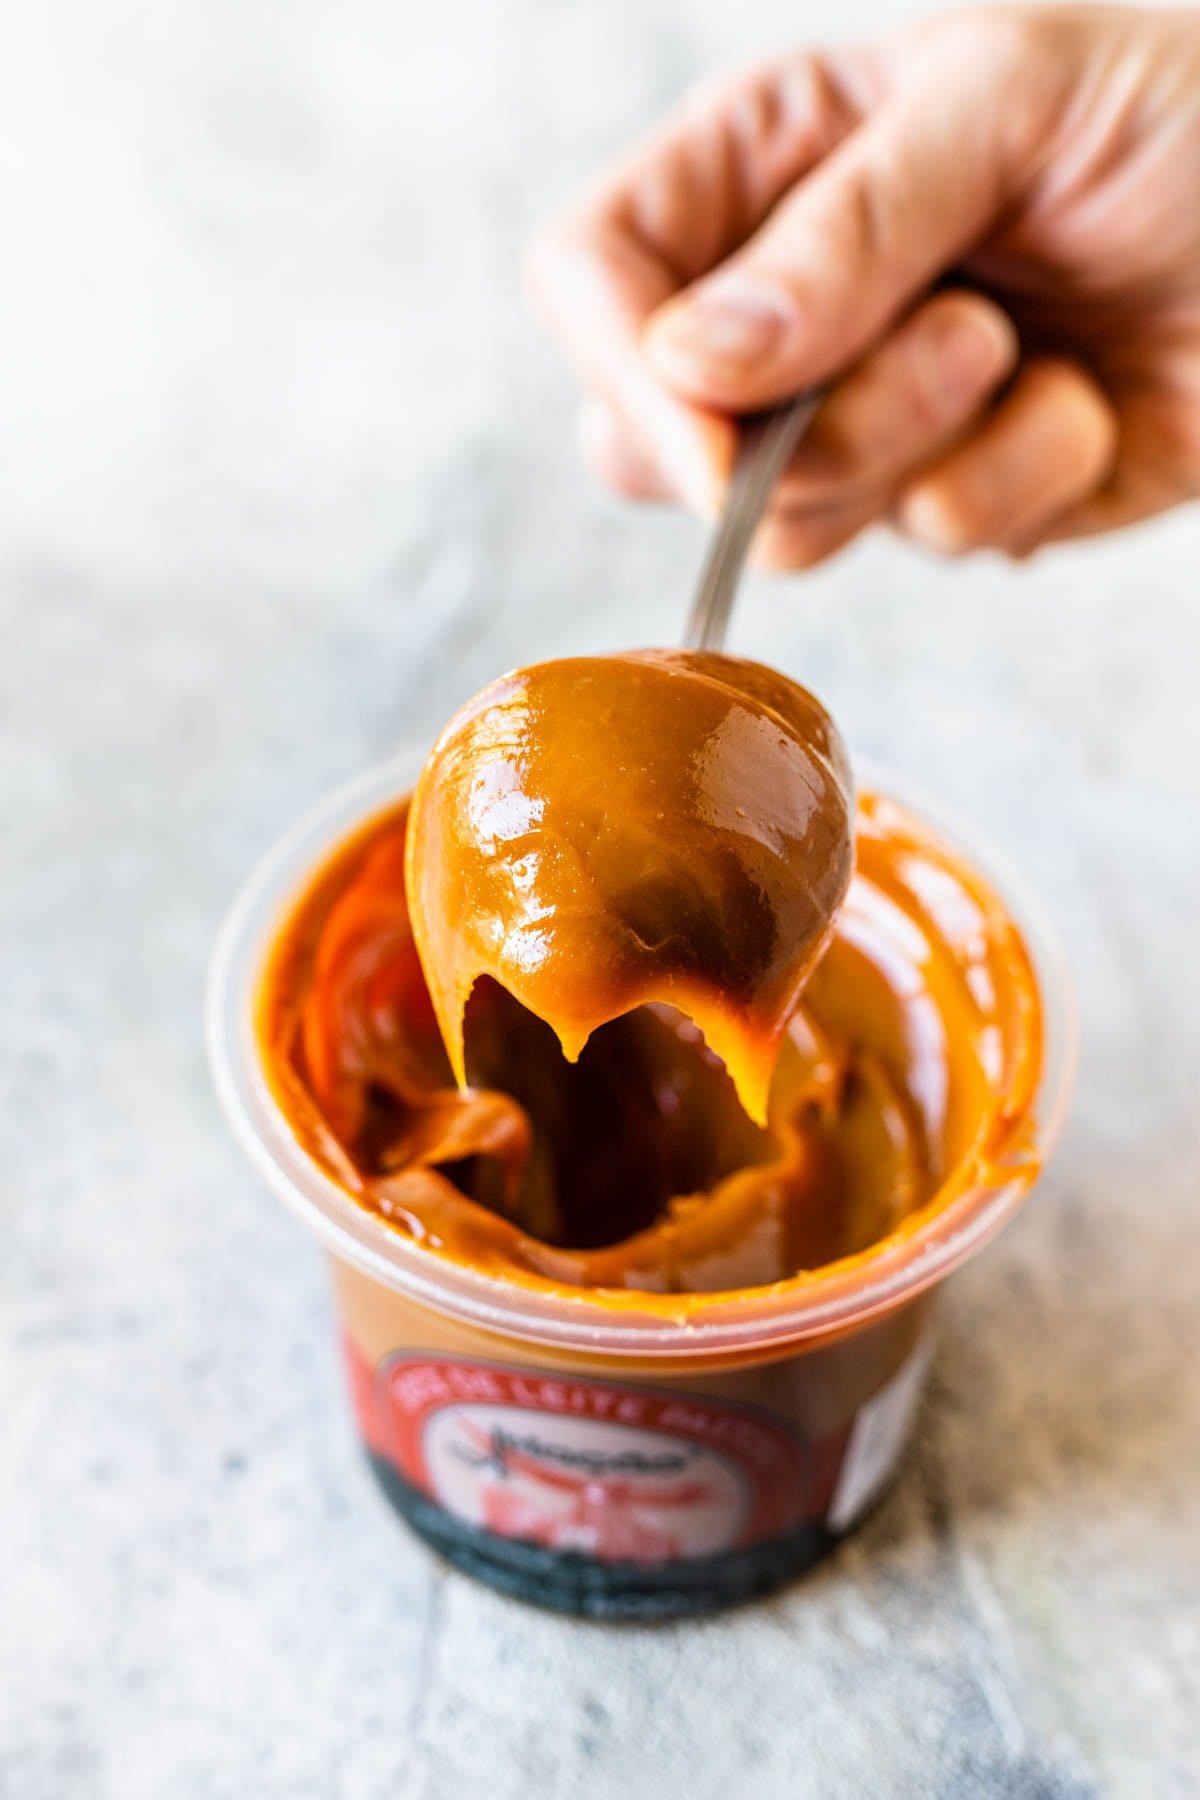
You can absolutely eat it with a spoon.
But here’s where it really shines:
- Filling macarons like these delicious Dulce de Leche Macarons.
- Layering cakes like my favorite Dulce de Leche Cake.
- Swirling into cheesecakes, and here’s my Dulce de Leche Cheesecake recipe for you to enjoy.
- Sandwiching alfajores, or other cookies like these Dulce de Leche Thumbprints, or these Dulce de Leche Crumble style cookies.
- Drizzling over pancakes
- Filling cupcakes, like my Salted Dulce de Leche Cupcakes, these delicious Pumpkin Dulce de Leche Cupcakes, or the best ever Dulce de Leche Mocha Cupcakes.
- Mixing into brigadeiro. In Brazil, we call it Churros Brigadeiro.
Flavor Pairings
Dulce de leche loves contrast.
Here are combinations that work beautifully:
- Nuts – pecans, walnuts, hazelnuts
- Chocolate – especially dark chocolate
- Apples – warm and cozy
- Bananas – soft and sweet
- Vanilla cake – classic
- Coffee – balances the sweetness
- Salt – enhances depth
If you want to experiment, try pairing it with toasted nuts inside cakes or swirled into chocolate batter.
FAQ
No. Unfortunately, they don’t behave the same way.
My sister is lactose intolerant and loves dulce de leche so I’ve tested non-dairy condensed milks like coconut milk using all of these methods, but they don’t work. It always fails to caramelize properly or thicken into true dulce de leche.
If you need a dairy-free option, you’ll have to add some extra ingredients to give it that same texture. Lucky for you, I have a tried and true recipe for Vegan Dulce de Leche using coconut milk!
Yes — and it freezes beautifully. Because of the high sugar content, it never freezes completely solid. It stays scoopable even straight from the freezer.
You can freeze it for 1–2 months. Use it directly from frozen. Enjoy it by the spoonful!
It’s actually one of my favorite freezer treats.
Store in an airtight container in the refrigerator for up to 2 weeks.
Thank you so much for reading! If you have any questions about dulce de leche, recipe suggestions, leave them down below! Enjoy your sweet dulce de leche!
I am a macaron cottage baker in NYS and use your macaron recipes. I am wondering if this needs to be refrigerated? I would love to add this to my flavors in addition to the shortening based approved fillings. I love the fact that it freezes well.
Dulce de leche by itself does need to be frozen. You can make brigadeiro with it, and then it doesn’t have to be frozen. I have several brigadeiro filling recipes through my ebooks, and also an ebook on shelf-stable fillings. Also here on the website. Any brigadeiro recipe can be used to fill macarons, including this churros one which is made with dulce de leche, you’ll just have to cook a bit less and also add a bit of cream so you’re able to pipe it.
Thank you for all this info!
My mom used to cook hers on the stove and would put it in her homemade turtle chocolates she would make at Christmas time! Brings back wonderful memories! So YUM!
That sounds amazing truly! I love that! Thanks, Kim! Have a lovely day!
I am confused by your instructions under the instant pot method. You mentioned that it was your favorite method because the results are consistent and it only takes like 30 minutes, but the directions say to fully submerge in water and to cook for 2 1/2-4 hours. What are the actual instant pot directions,
Sorry about that, the instructions for the stove top method got copied to the wrong spot. Fixing it now!! Thank you for pointing it out!
Is 35 minutes the longest time you would set on an insta pot for the deepest, thickest dulce de leche?
Yes. Correct. I have never cooked longer than that. I just let the pressure release naturally and let it cool down all the way in the water.
I used this recipe for a Spanish Class project, and absolutely loved it! The instructions were very clear which made it easy for a non-experienced Baker like me to understand.