Cinnamon Roll Macarons
Hello friends! Today we are going to make the most delicious macarons ever! Cinnamon Roll Macarons coming in hot!
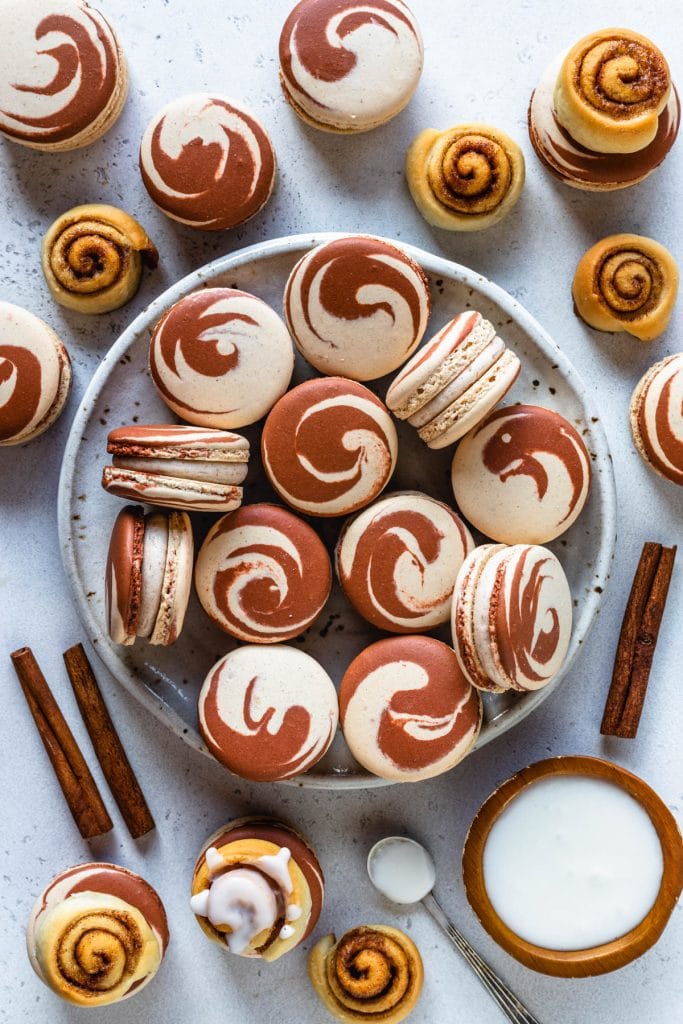
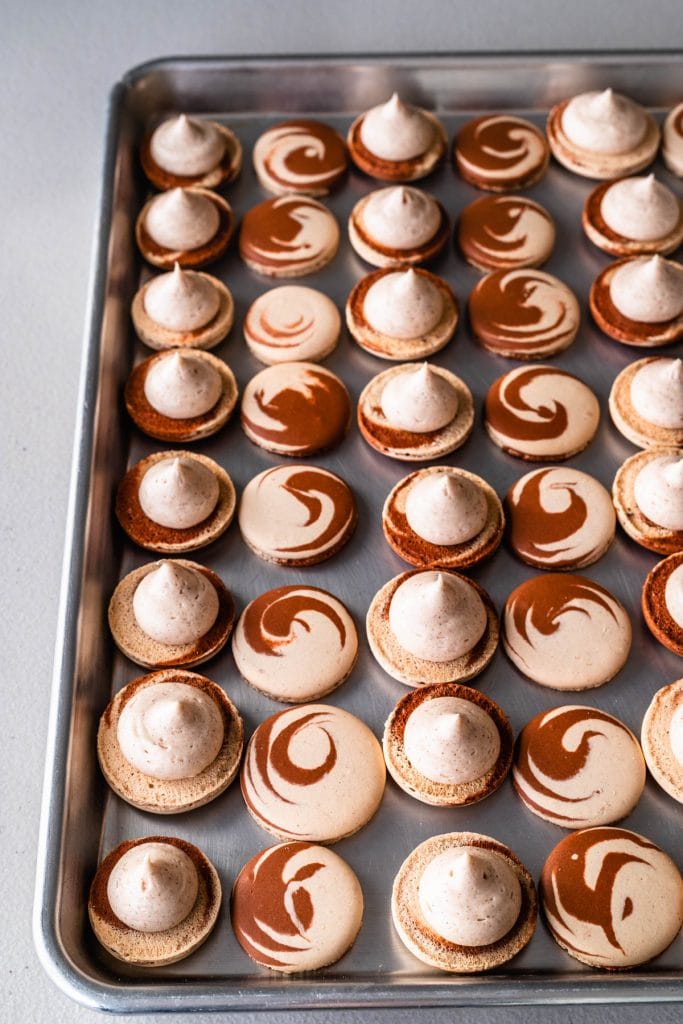
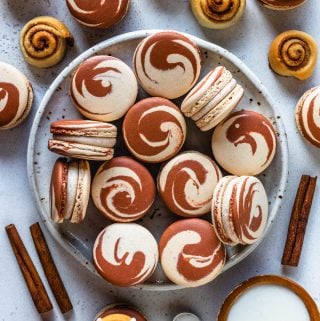
Make sure to watch the video on this page or on YouTube, to see how I made the swirl effect on the macaron shells.
I have been wanting to create beautiful Cinnamon Roll Macarons for a long time! And finally they are here!
This post may contain affiliate links. I earn a commission from qualified purchases. Please read our Privacy policy here.
It’s fall, almost winter, and the weather is calling for all the cinnamon recipes!
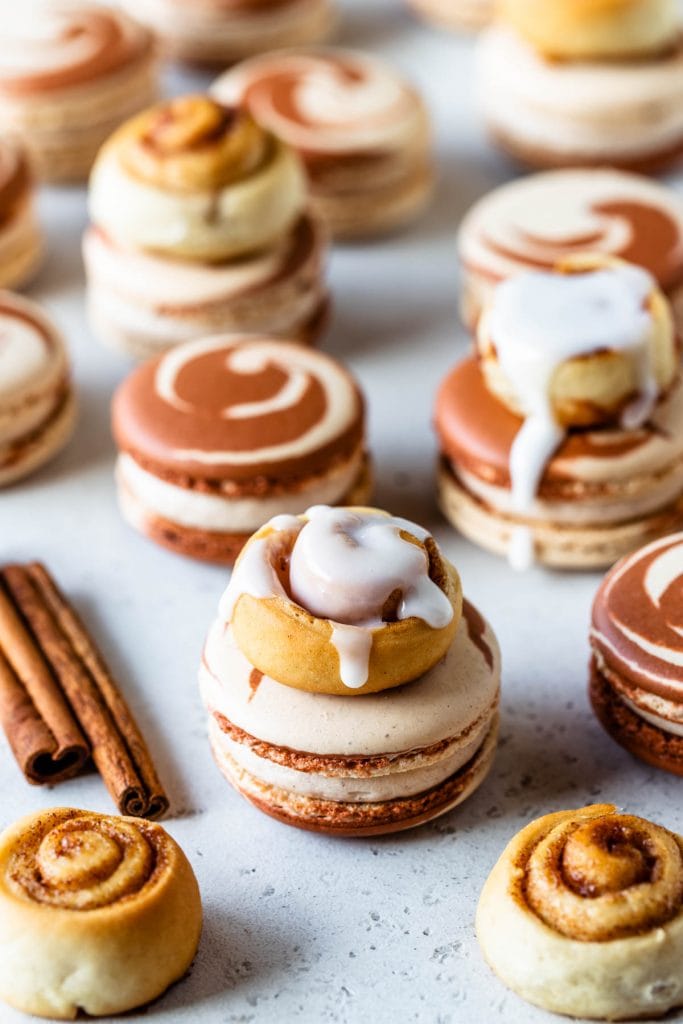
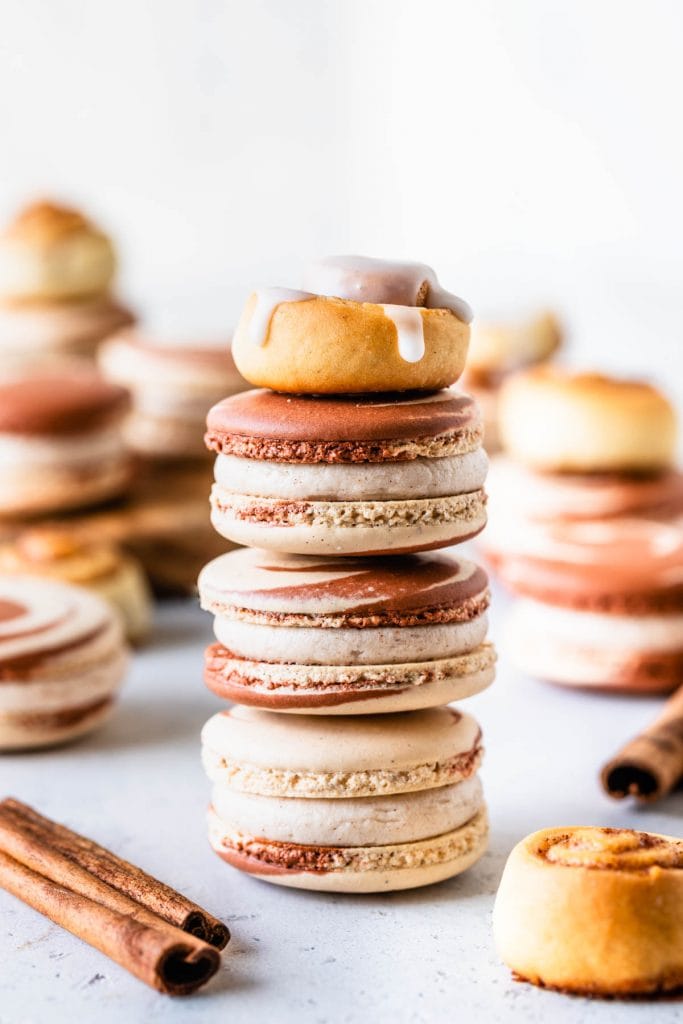
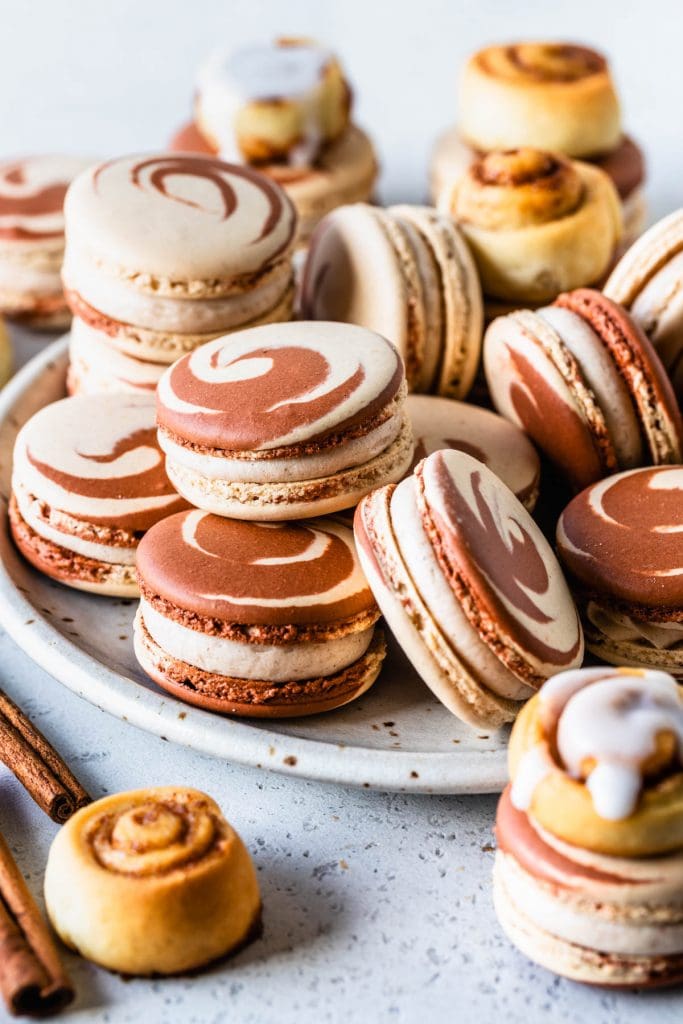
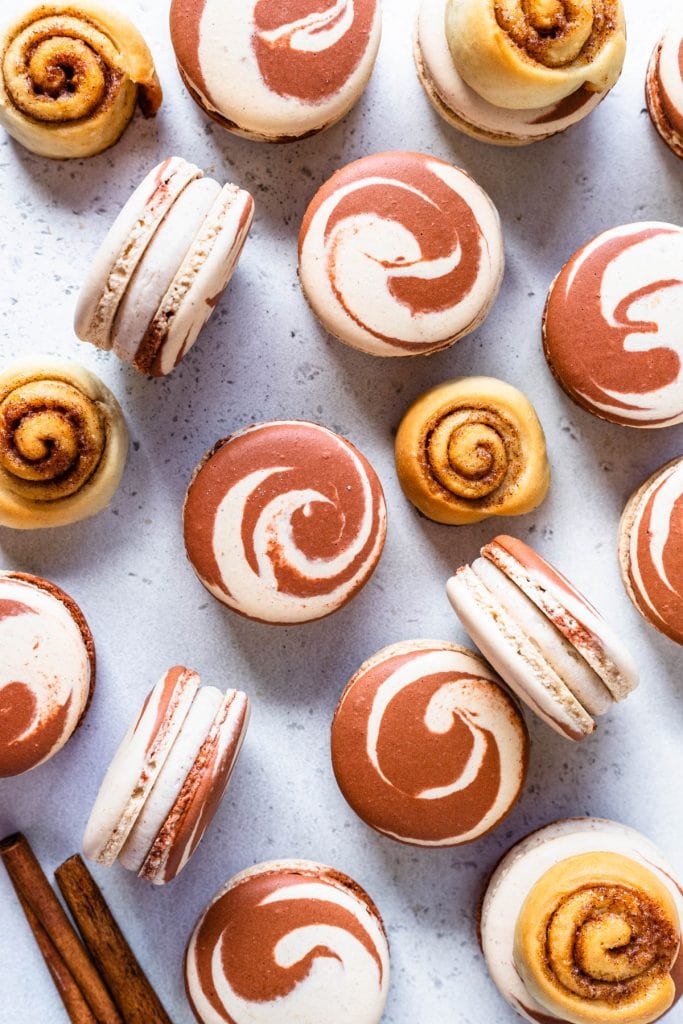
The mini cinnamon buns that you can see in these pictures are super cute too, and I am publishing a post soon showing you how to make them. For now, you can grab the recipe for them on my Cinnamon Roll Cupcakes recipe.
I explain in detail down below how to make the swirled shells, however, I really recommend watching the YouTube video or the video here on this page, which will be super helpful in helping you learn how to make the swirl.
We start with just one batter, which we will make into two different colors: white and brown. The white is kind of a cream color for a few reasons, one- I added 1 tsp of cocoa powder to the dry ingredients because I wanted a bit of a tan color to the shells, since no cinnamon roll is actually white; two- once they bake, white macarons tend to turn orange/yellow-ish.
Then, we transfer each batter to a piping bag, snip the ends off, and place both piping bags in a larger piping bag, fitted with a round tip.
And that’s when we begin to pipe.
Make sure to watch the video and read the instructions below, to see exactly how to make the different color shells from the same batter.

The technique for piping the swirls is not the same as I usually use to pipe the macarons.
Usually, I recommend the following: position the bag directly 90 degrees over the center of each circle template, then apply gentle pressure for about 3 seconds, and pull the bag up.
However, if you pipe it like that, the shells are just going to be half brown, and half white.
Which is why for these Cinnamon Roll macaron shells, I recommend positioning the bag 90 degrees over the center of the template, then using a circle motion to go around a few times, until you fill up almost the entire circle template. This way the batters will be swirled.
Another tip for piping the shells for the Cinnamon Roll Macarons, is to use a smaller tip, I used a 0.25″ diameter tip. I usually use a 0.5″ diameter tip to pipe my regular shells.
If you use the large tip, a lot of batter will be dispensed and you won’t be able to get a nice swirl.
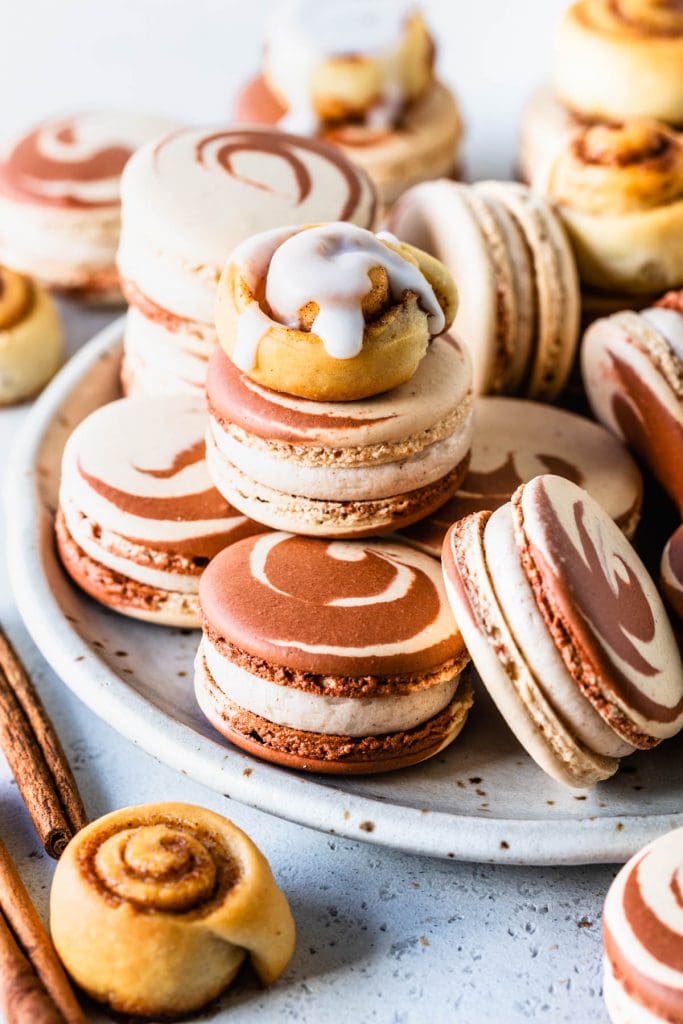
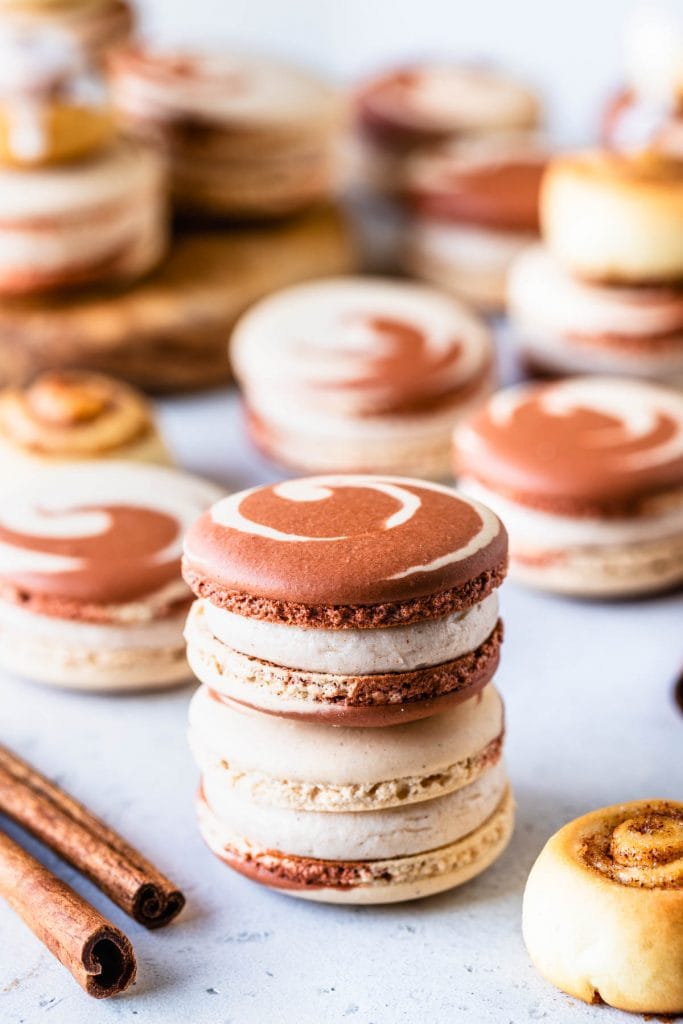
For the filling of the Cinnamon Roll Macarons, I used my ultimate favorite frosting: Cinnamon Cream Cheese Frosting!
I also use this frosting on my Cinnamon Roll Cupcakes, Apple Crisp Cupcakes, and on my Apple Macarons.
Also, notice that I am making this batch of macarons using egg white powder, which is something I started a little while ago, following advice from Nicole from Bake Toujours.
Egg white powder is not the same as meringue powder, so pay close attention when purchasing it. I can’t find it at the store, so I get mine online.
It helps the quality of the shells by improving the strength of the meringue, because you are essentially adding more protein to the meringue, without adding any extra moisture, since the egg white powder is dehydrated egg whites.
The results: fuller macarons, with better feet. Since the meringue is the base of the structure of the macarons, having a strong foundation helps with the final product.
If you like these Cinnamon Roll Macarons, here are some more recipes you may enjoy:
- Eggnog Macarons
- Pumpkin Cheesecake Macarons
- Carrot Cake Macarons
- Apple Macarons
- Pear Macarons
- Cinnamon Toast Crunch Macarons
- Gingerbread Macarons
- Pumpkin Caramel Macarons
- Nutella Macarons
- Pistachio Macarons
- Chai Macarons
Also make sure to check out Macaron School, where I gather the best resources for you to learn how to make macarons! Lots of tips, tricks, troubleshooting guides, the science behind macarons, and more!
Thank you for reading today’s post, leave a comment below, and tag me on instagram if you make my recipes! Happy baking!
Cinnamon Roll Macarons
Ingredients
Macaron Shells
- 4 grams egg white powder optional read notes
- 100 grams granulated sugar
- 100 grams egg whites
- 105 grams almond flour
- 105 grams powdered sugar
- 1 tsp cocoa powder (optional, for color)
- 1/4 tsp cinnamon powder
- Food coloring I used brown food coloring for the brown batter
Cinnamon Cream Cheese Frosting
- 85 grams cream cheese softened
- 42.5 grams unsalted butter softened
- 113 grams powdered sugar about
- 1 tsp cinnamon powder or more to taste
- 1/4 teaspoon vanilla extract
Instructions
Macaron Shells
- Before you start, get all of the ingredients ready. Prepare one large piping bag, fitted with a round tip, I used a 1/4” diameter tip. Also leave two piping bags set aside, without the end cut. Set aside.
- Line two baking sheets with parchment paper or silicone mat.
- Measure out all of the ingredients.
- Sift the powdered sugar, almond flour, cocoa powder, and cinnamon together. Set it aside. I am using cocoa powder to give the shells a tan color, since cinnamon rolls aren't white, they have a orange/light brown color. The cocoa powder is optional.
- Whisk the sugar and the egg white powder (if using) in a bowl, and place it over a pan with barely simmering water. Add the egg whites to the sugar and whisk the mixture until frothy and the sugar is completely melted. It will take a couple of minutes. You can test by touching the mixture between your fingers, and if you feel any sugar granules just keep whisking the mixture over the water bath.
- Make sure the bottom of the bowl isn’t touching the simmering water because you don’t want the whites to cook.
- Also, don’t overheat the sugar syrup, this may cause issues down the line, such as wrinkly macarons.
- Transfer the syrup to the bowl of a stand mixer.
- With the whisk attachment, start whisking the syrup on low for about 30 seconds, then gradually start increasing speed to medium. Whisk on medium for one to two minutes, until the mixture is white and starting to become fluffy. Raise the speed to high, or medium-high and whisk for a few minutes until stiff peaks are formed. Best way to check this is to keep your eye on the whites. Once they get glossy and you start seeing streaks formed by the whisk, it might be time to stop.
- Whisk until stiff peaks have formed. When you pull your whip up, the peak should be stiff and shooting straight up, with possibly a slight bend at the top, but not bending down to the side.
- Pour the sifted powdered sugar and almond flour into the stiff meringue.
- Start folding gently forming a letter J with a spatula.
- If making two different colors from the same batch, like I am for the Cinnamon Roll Macarons, fold the dry ingredients with the meringue just until you see no more dry ingredients in the meringue. If making just one color, ignore this and continue to fold the batter until the proper consistency is achieved. Which I will explain below how to identify. If making just one color batter, add the food coloring in the beginning.
- Anyway, back to the two colors batch. As soon as you see no more dry ingredients in the meringue, stop stirring. Divide the batter between two different bowls, I divided the batter like so: 2/3 of the batter for the white color, and 1/3 for the brown color.
- Work with one bowl at a time, leaving the other one covered meanwhile.
- To the first batter I didn’t add any color, so I just stirred it until the perfect consistency was achieved. Read below how to identify.
- Once that happens, transfer this first batter to one of the piping bags that doesn’t have the end cut. Secure the top with a tie, so the batter doesn’t scape while piping. Set the piping bag aside.
- Now, it’s time to work with the second batter. I added brown food coloring. After adding food coloring, stir until the perfect consistency is achieved.
- How to know when to stop folding the batter: It’s time to stop folding when the batter is glossy and has a thick and flowing consistency. There are several ways to test this.
- First, pick up some batter with the spatula and try to draw a figure 8 with the batter that is dripping off the spatula. If you can form several 8 figures without the batter breaking up, that’s one indication that it might be ready.
- There’s another test you can do. I call it the Teaspoon test.
- Grab a teaspoon of batter and spoon onto the parchment paper or silicon mat. Wait a minute to see how it behaves.
- If the batter stays stiff, forming a point and doesn’t spread out, fold a little bit more, about 3 folds.
- Test again.
- Once the batter spreads out a bit and starts to look glossy and smooth on top, on the parchment paper, it’s ready.
- You don’t want your batter to be too runny either. So be careful not to over mix. It’s always best to under mix and test several times until the proper consistency has been achieved.
- When you hold the spatula with batter on top of the bowl and the batter falls off the spatula slowly but effortlessly the batter is ready. The batter will keep flowing off the spatula non-stop, but not too quickly.
- Transfer the brown batter to another piping bag, also without the end cut. And secure the top with a tie.
- Using a pair of scissors, snip the ends of each piping bag.
- Place the large piping bag fitted with the round tip (I used a 1/4” piping tip) in a cup, so this way the bag will be held open.
- Place the bags with the two different color batters inside the piping bag.
- Now position the piping bag over the center of the circle template, and start applying gentle pressure to release the batter, while making a circle motion. This motion will make the swirl. The size of the circle should be about 1.25” in diameter, or slightly smaller than the circle template. You can watch the video to see exactly how to do this technique. The video is on YouTube or on this page.
- Once you’ve piped as many circles as you could, bang the trays against the counter.
- Use a toothpick to pop any air bubbles on the surface of the shells.
- Let the trays sit for a while so the shells will dry out a little bit. I usually leave about 20-40 minutes, depending on how humid the day is. You’ll know they’re ready when you gently touch the surface of a macaron and it seems dry, and doesn’t stick to your finger.
- Pre-heat the oven to 300ºF.
- Bake one tray at a time.
- Bake for 5 minutes, rotate tray.
- I bake each tray for about 15 to 20 minutes.
- When baked, the macarons will have a deeper color and formed feet. If you try to move a macaron, it shouldn’t feel jiggly. If the macaron is still jiggly, keep baking.
- Remove from the oven and bake the other tray.
- Let the macarons cool down before proceeding with the filling.
Cinnamon Cream Cheese Frosting
- Start by sifting the powdered sugar with the cinnamon. Set it aside.
- Now, cream the softened cream cheese and butter together in the bowl of an electric mixer, for about 2 minutes, until light and fluffy.
- With the mixer off, add powdered sugar/cinnamon mixture to the bowl.
- Turn mixer on low to incorporate the powdered sugar with the cream cheese and butter.
- Once you see no streaks of dry powdered sugar, cream mixture on medium high for one minute.
- Add vanilla extract. Mix to combine.
- This frosting will store well in the fridge for up to 5 days, covered.
- Make sure to always leave your frosting covered. Cover the bowl with a lid or plastic wrap, because otherwise, the surface will dry out and create a skin.
To assemble
- Place the frosting in a piping bag fitter with the tip of choice. I just used a round piping tip.
- Pipe a dollop of frosting on each bottom shell. Top with another shell.
- Let the macarons mature overnight before enjoying.
Storage
- These macarons will store well in the fridge for 4 to 5 days, or in the freezer for 1 to 2 months.
Yours looked sooo cute I had to give it a go, and with egg whites hanging about there was no excuse not to! Swirled ok, but my results weren’t round – but that’s due to my lack of piping technique. Watching your video multiple times where you made it look easy did not, in fact, magically embue me with skill. As I was piping them, the spouse commented that with that colour, they resembled something else lol 🙂
p.s. if you add milk powder to cream cheese frosting, it helps firm it up a bit.