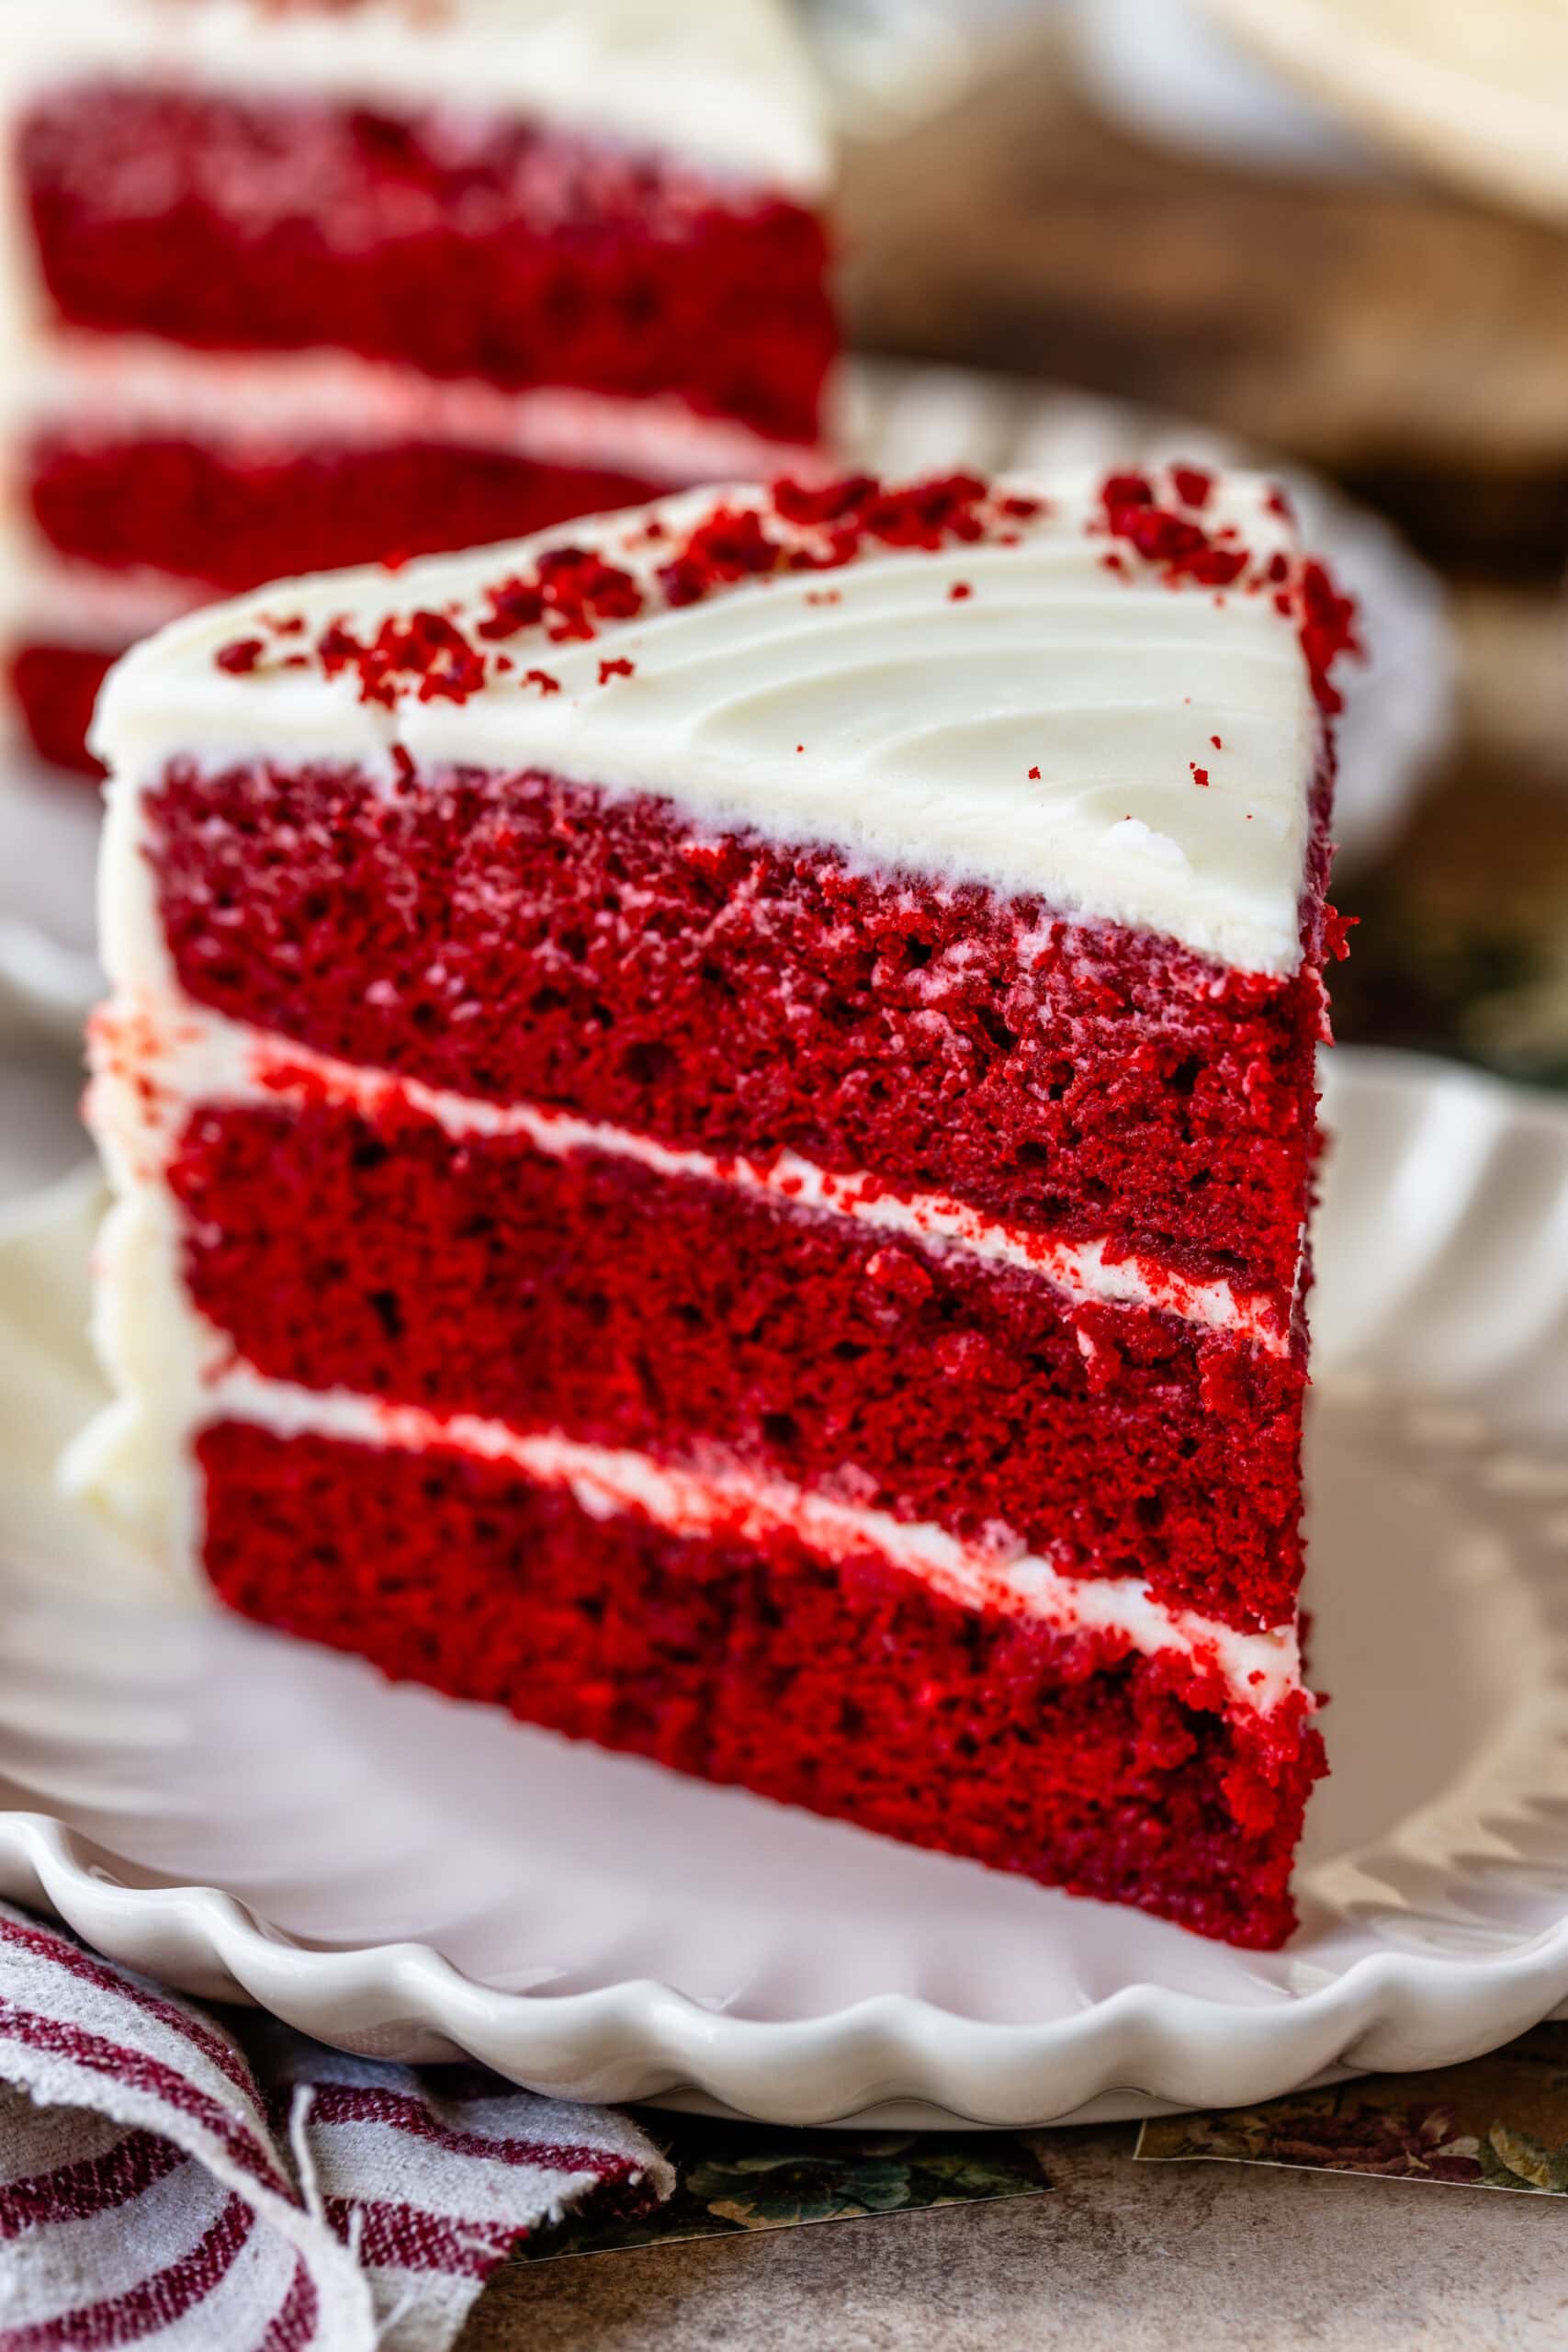
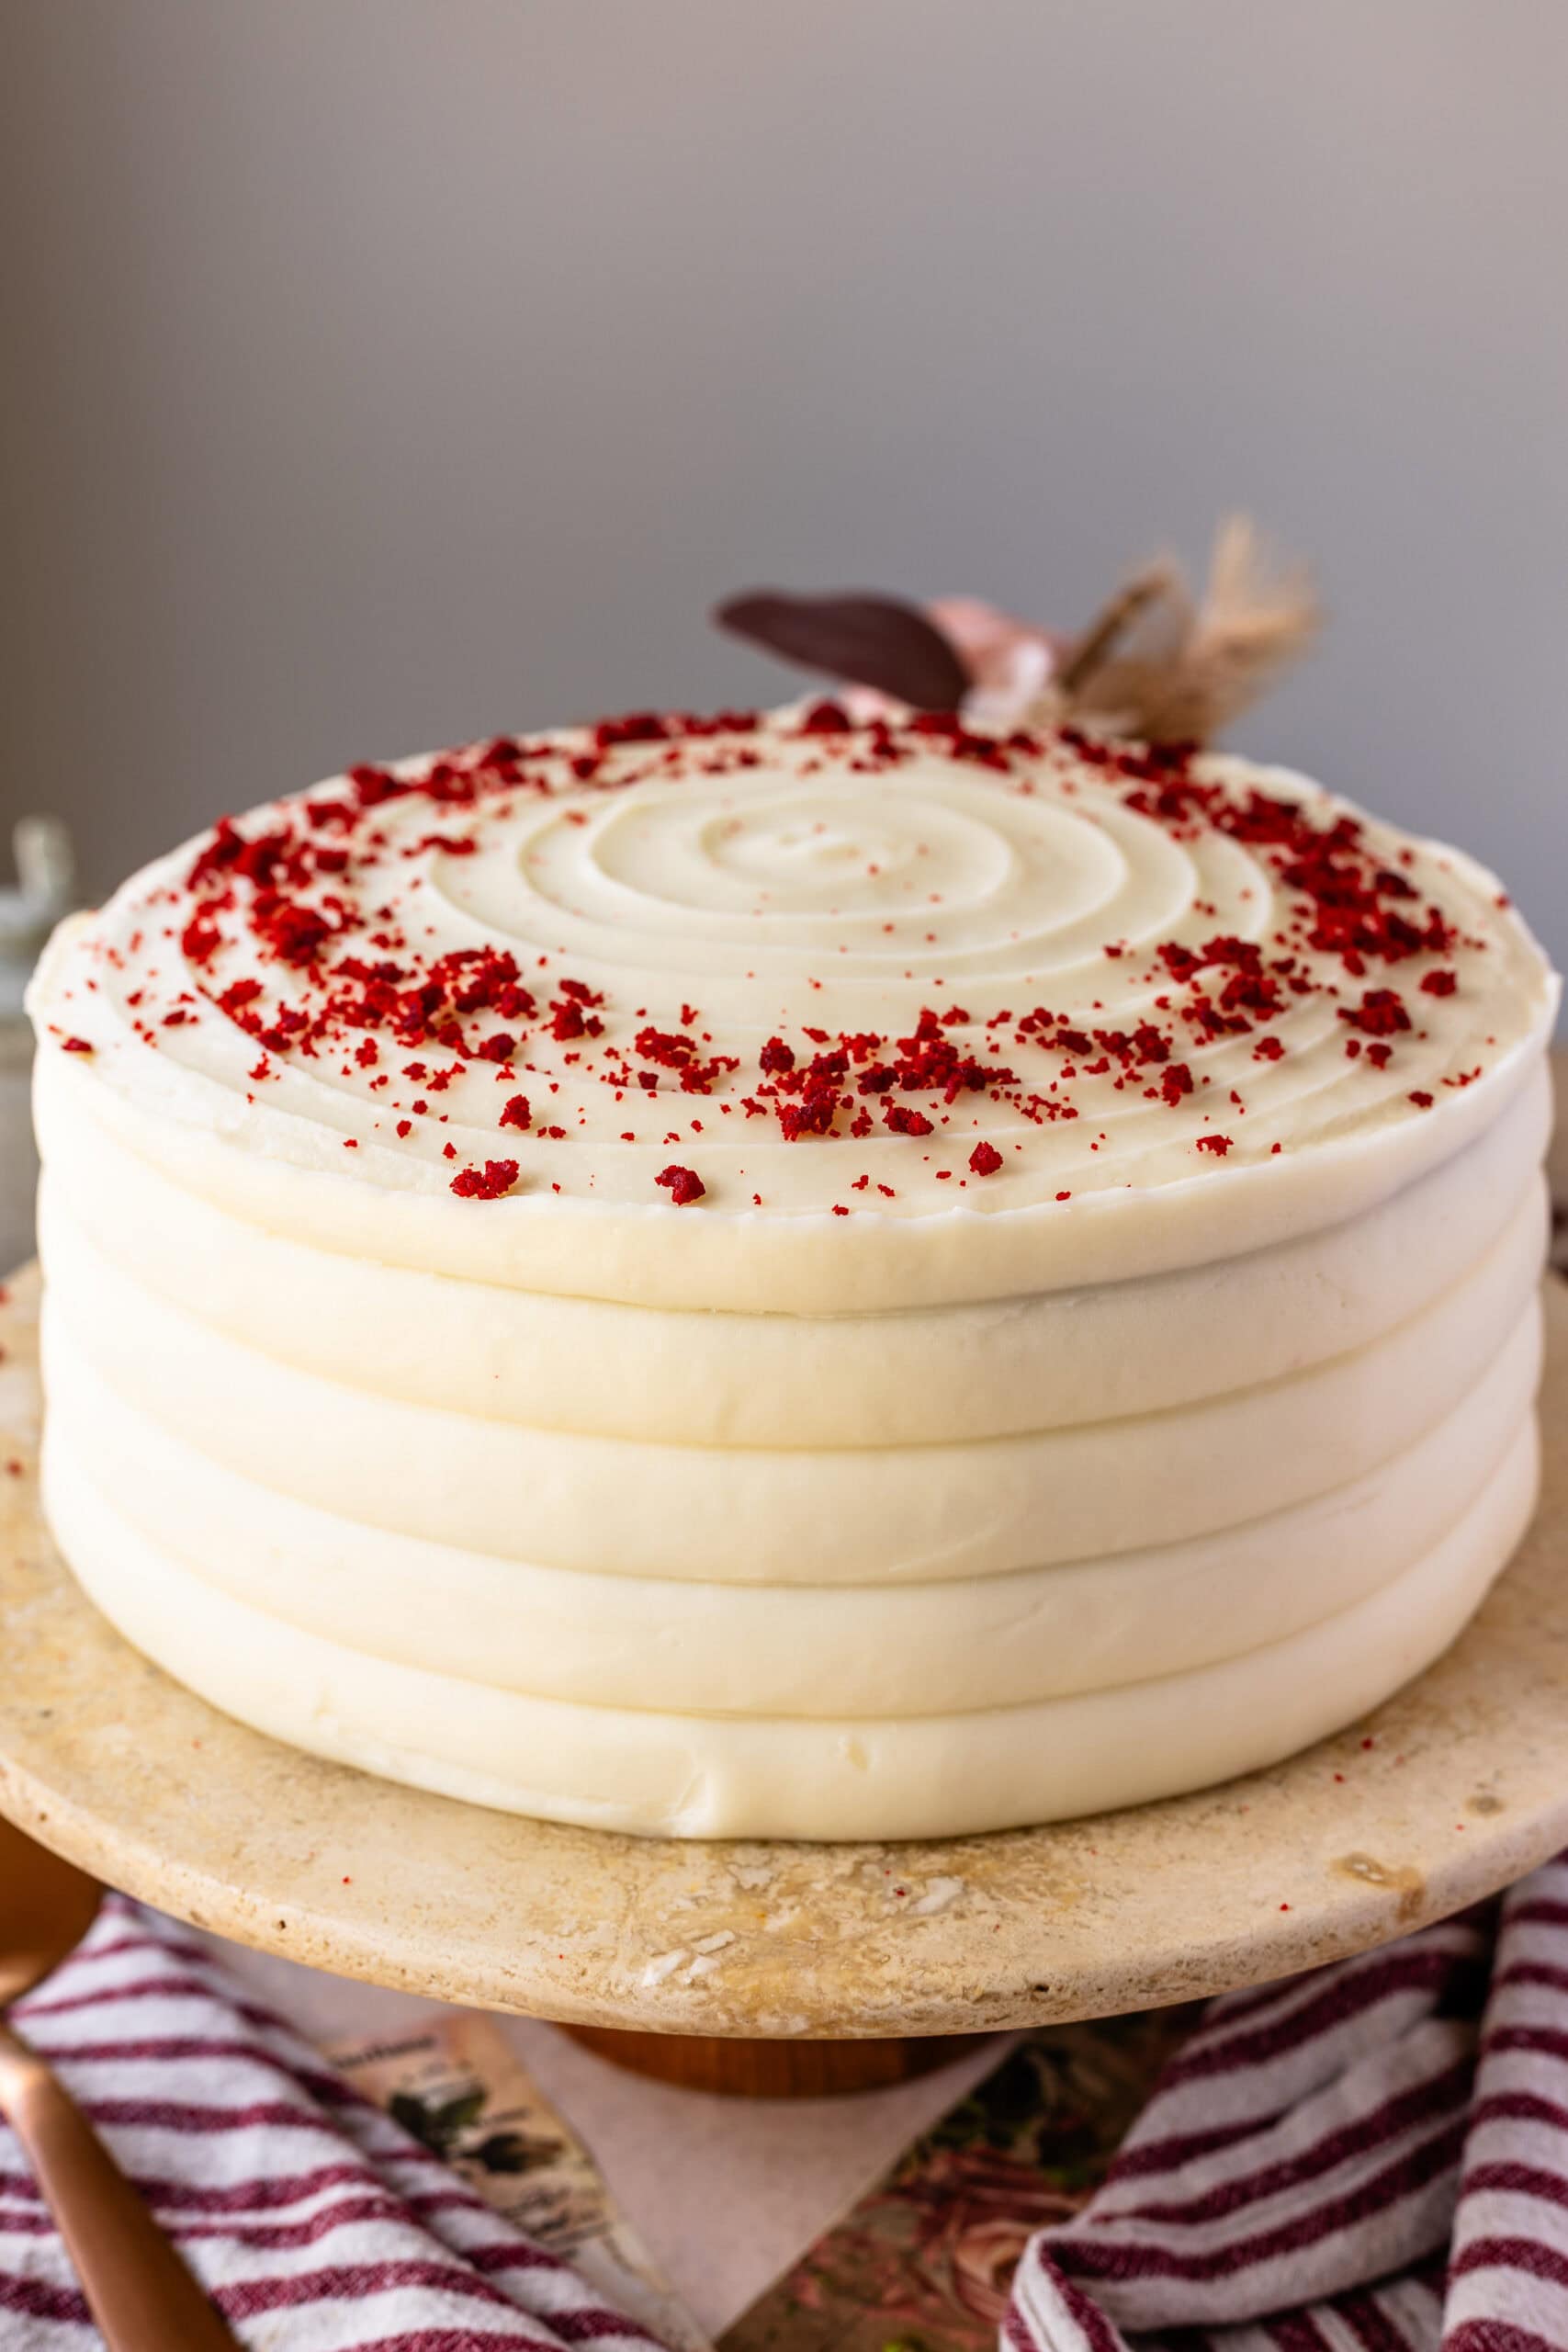
Red Velvet Cake
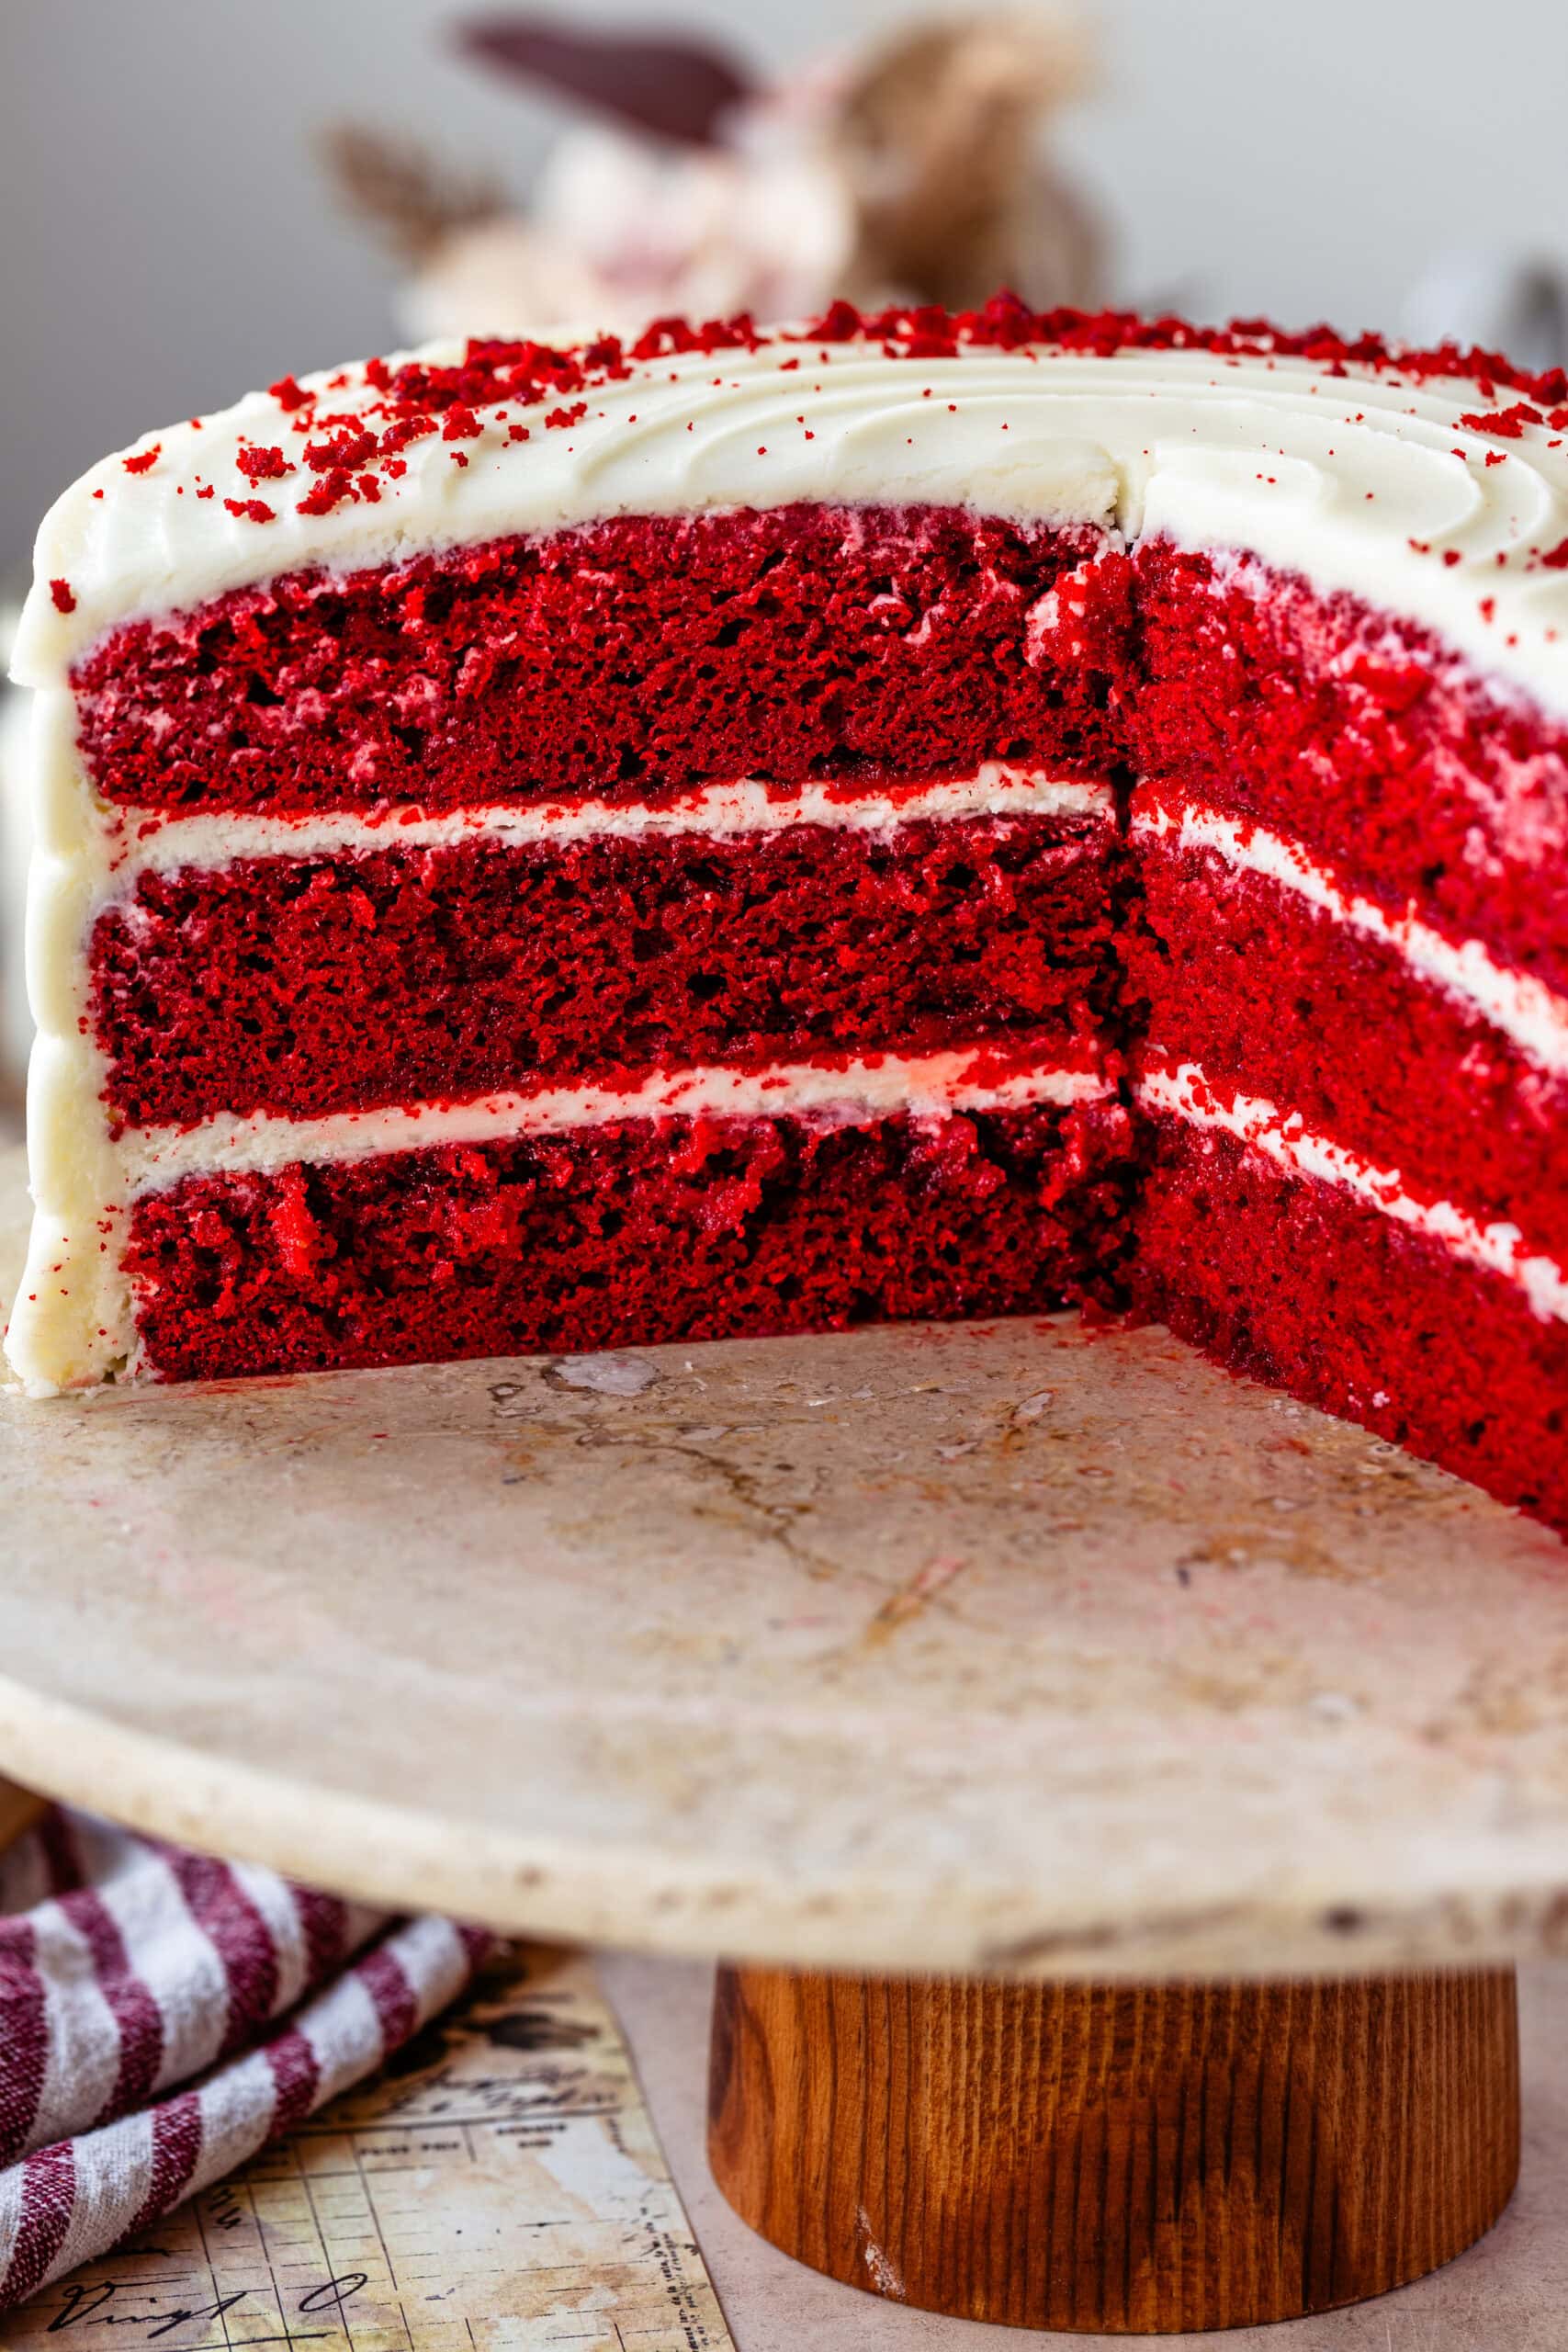
Hello friends! This Red Velvet Cake is a timeless classic—ultra-soft, tender layers of cocoa-flavored red cake paired with tangy cream cheese frosting. The vibrant color and delicate crumb make it a showstopper for any celebration, while the flavor is subtly chocolatey, with just the right balance of sweetness and tang. Finished with a smooth layer of frosting and a sprinkle of red velvet crumbs, this cake is as stunning as it is delicious.
The Best Red Velvet Cake Recipe
This recipe delivers three layers of buttery red velvet cake made with buttermilk, a touch of cocoa, and red gel food coloring for that iconic color. The layers filled with texture are filled and frosted with a lush, slightly tangy cream cheese frosting that complements the cake’s subtle chocolate notes. For an elegant finish, reserved cake crumbs are toasted and sprinkled on top.
Red Velvet Cake Batter
Start by preheating your oven to 350°F (175°C) and greasing three 8-inch cake pans, lining the bottoms with parchment.
This post may contain affiliate links. I earn a commission from qualified purchases. Please read our Privacy policy here.
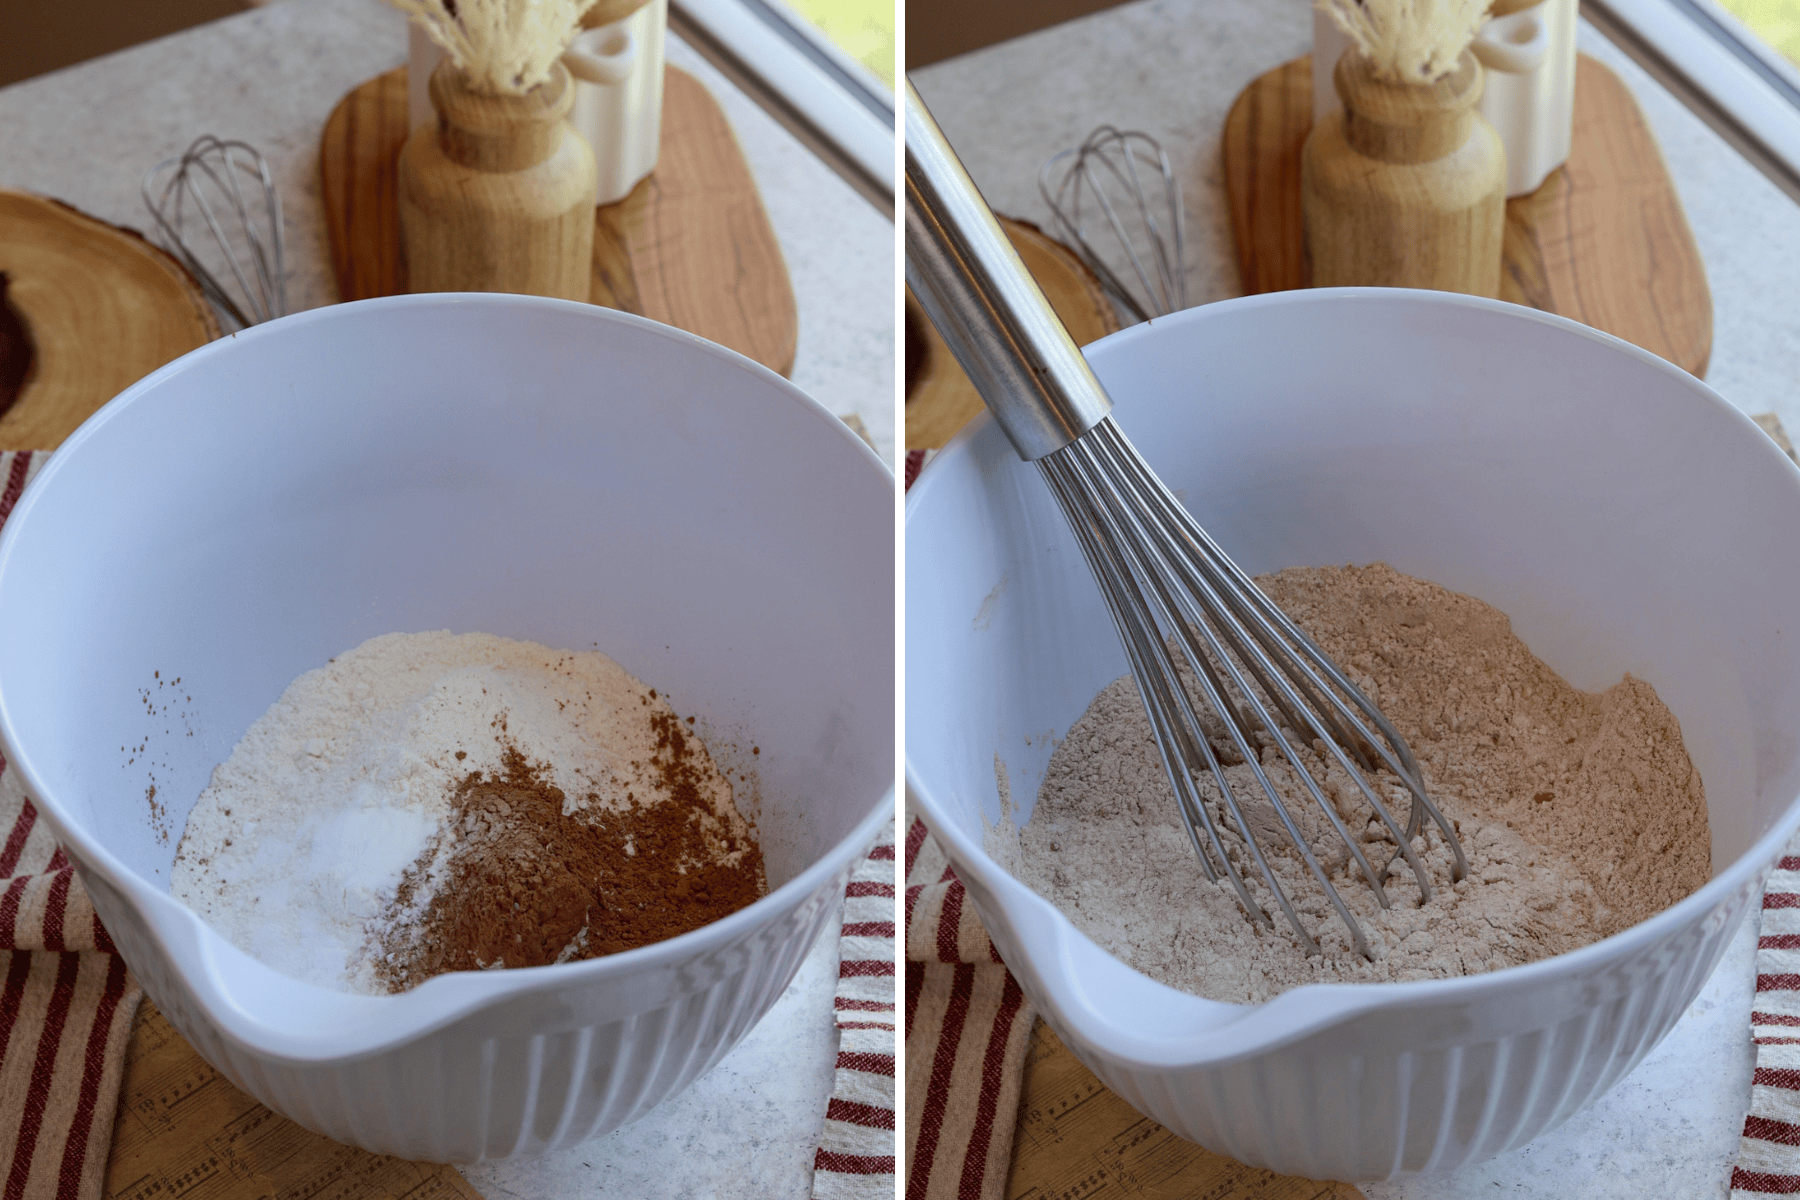
In a medium bowl, sift together the flour, cocoa powder, baking soda, and salt.
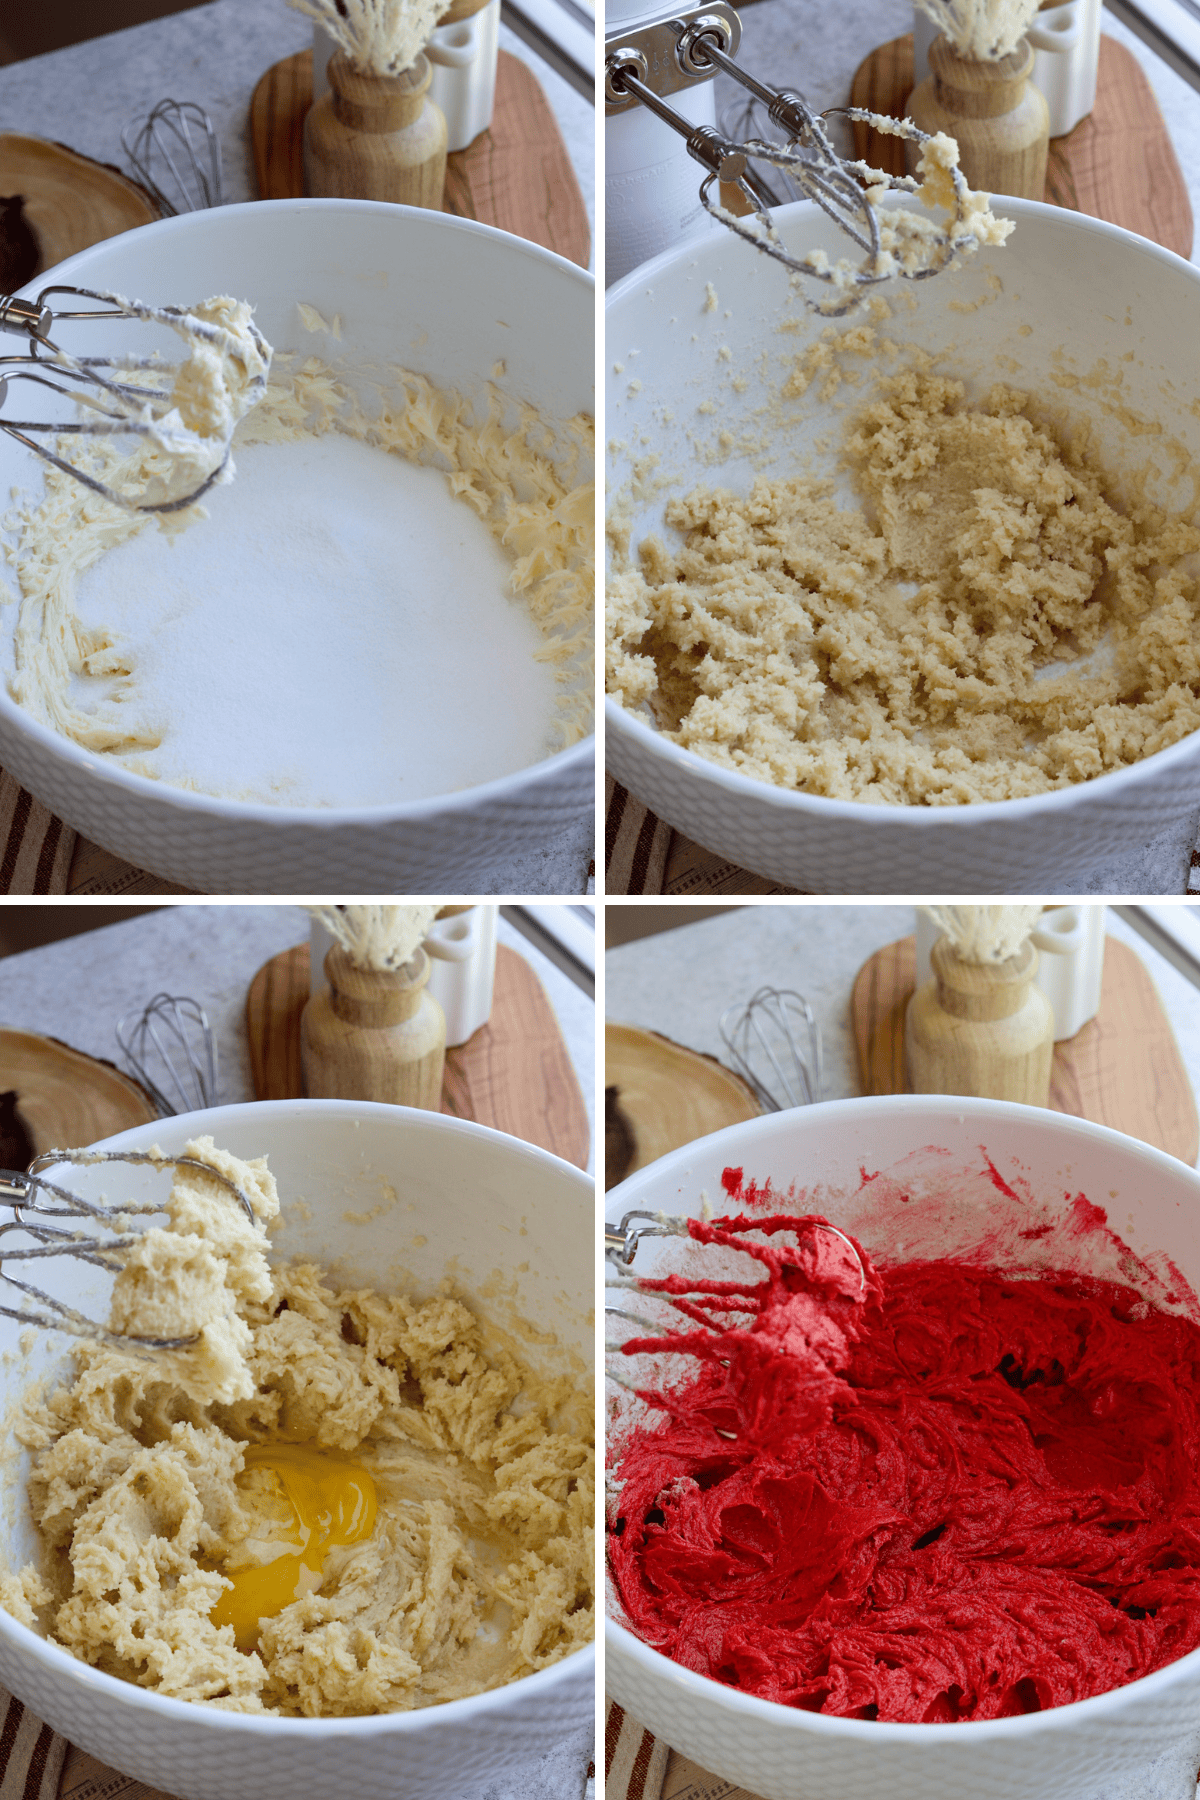
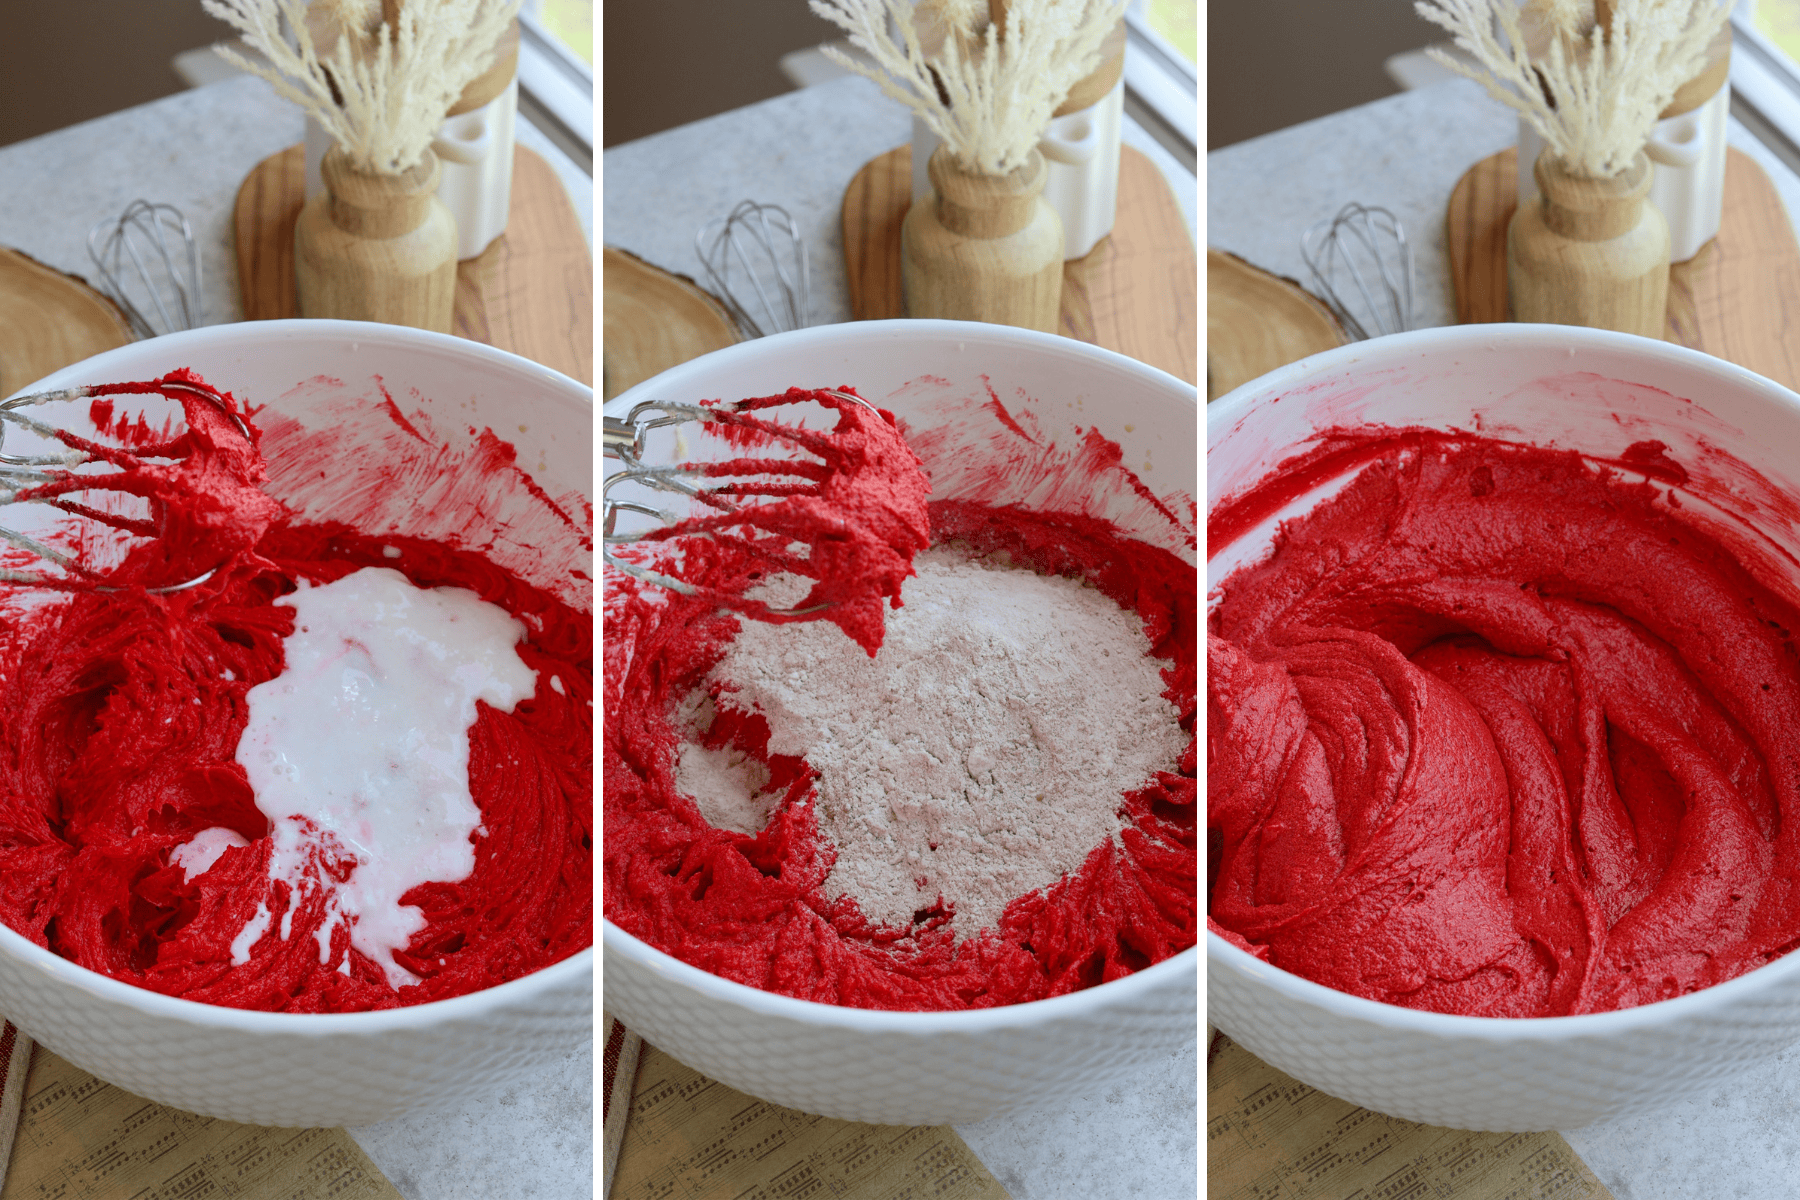
In a large mixing bowl or stand mixer, cream together the butter, granulated sugar, and brown sugar on medium-high speed for 3 to 4 minutes until pale and fluffy. Add the eggs one at a time, beating well between each addition, then mix in the vanilla extract, vinegar, and red gel food coloring until fully combined.
With the mixer on low speed, alternate adding the dry ingredients and buttermilk into the wet ingredients: start with one-third of the flour mixture, followed by half the buttermilk, then repeat, ending with the remaining flour. Mix and scrape the bowl just until the batter comes together—do not overmix.
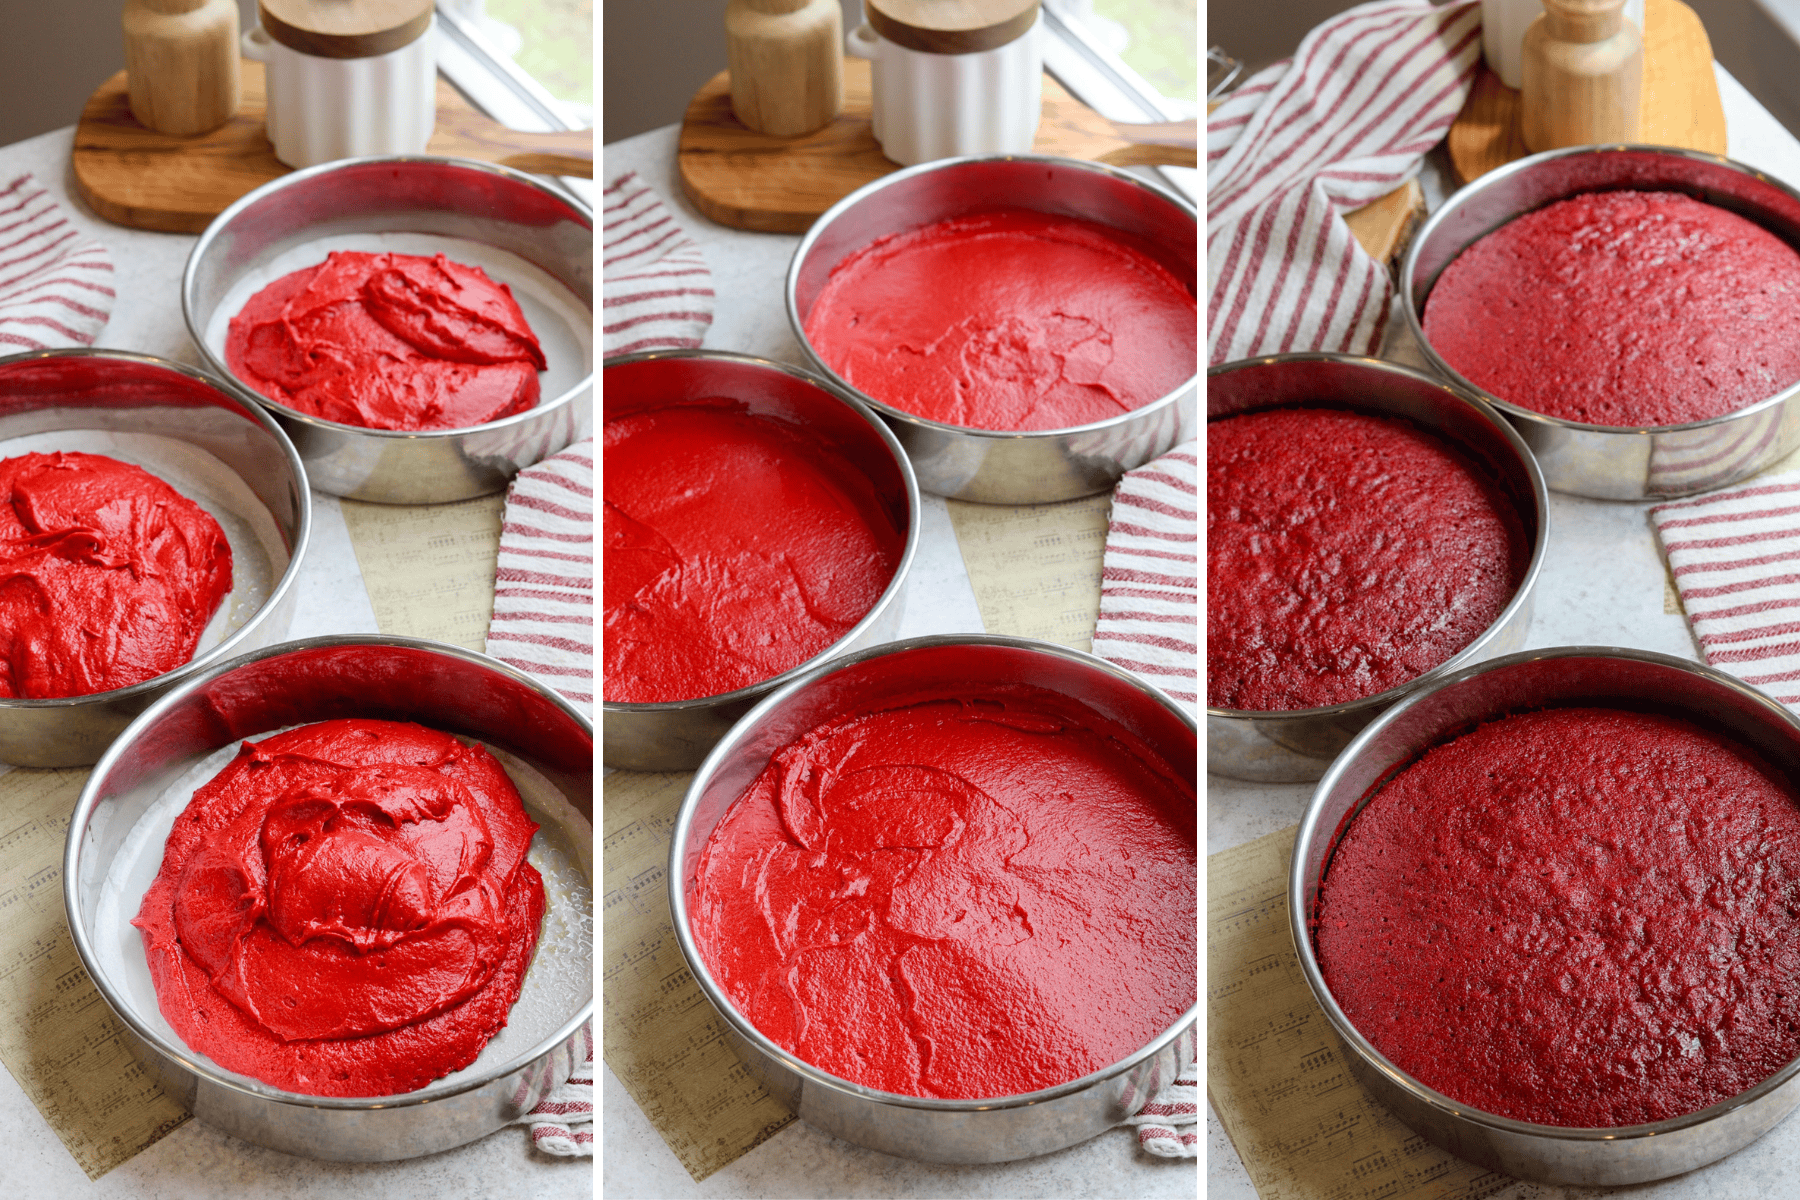
Divide the batter evenly between the prepared pans and tap them lightly on the counter to release air bubbles. Bake for 25 to 30 minutes, or until a toothpick inserted in the center comes out clean. Cool the cakes in their pans for 10 minutes, then invert onto wire cooling racks to cool completely.
Cream Cheese Frosting
Make sure to use room temperature ingredients. In a large bowl, beat the softened butter on medium speed with an hand mixer for 2 to 3 minutes until light and fluffy. Add the cream cheese and beat until the mixture is smooth and creamy. Gradually sift in the powdered sugar, one cup at a time, starting with 5 cups and adding more as needed to reach your desired consistency. If the frosting feels too stiff, add a teaspoon of milk or heavy cream at a time. If it’s too soft, incorporate more powdered sugar, and add more to taste.
Assembling the Red Velvet Cake
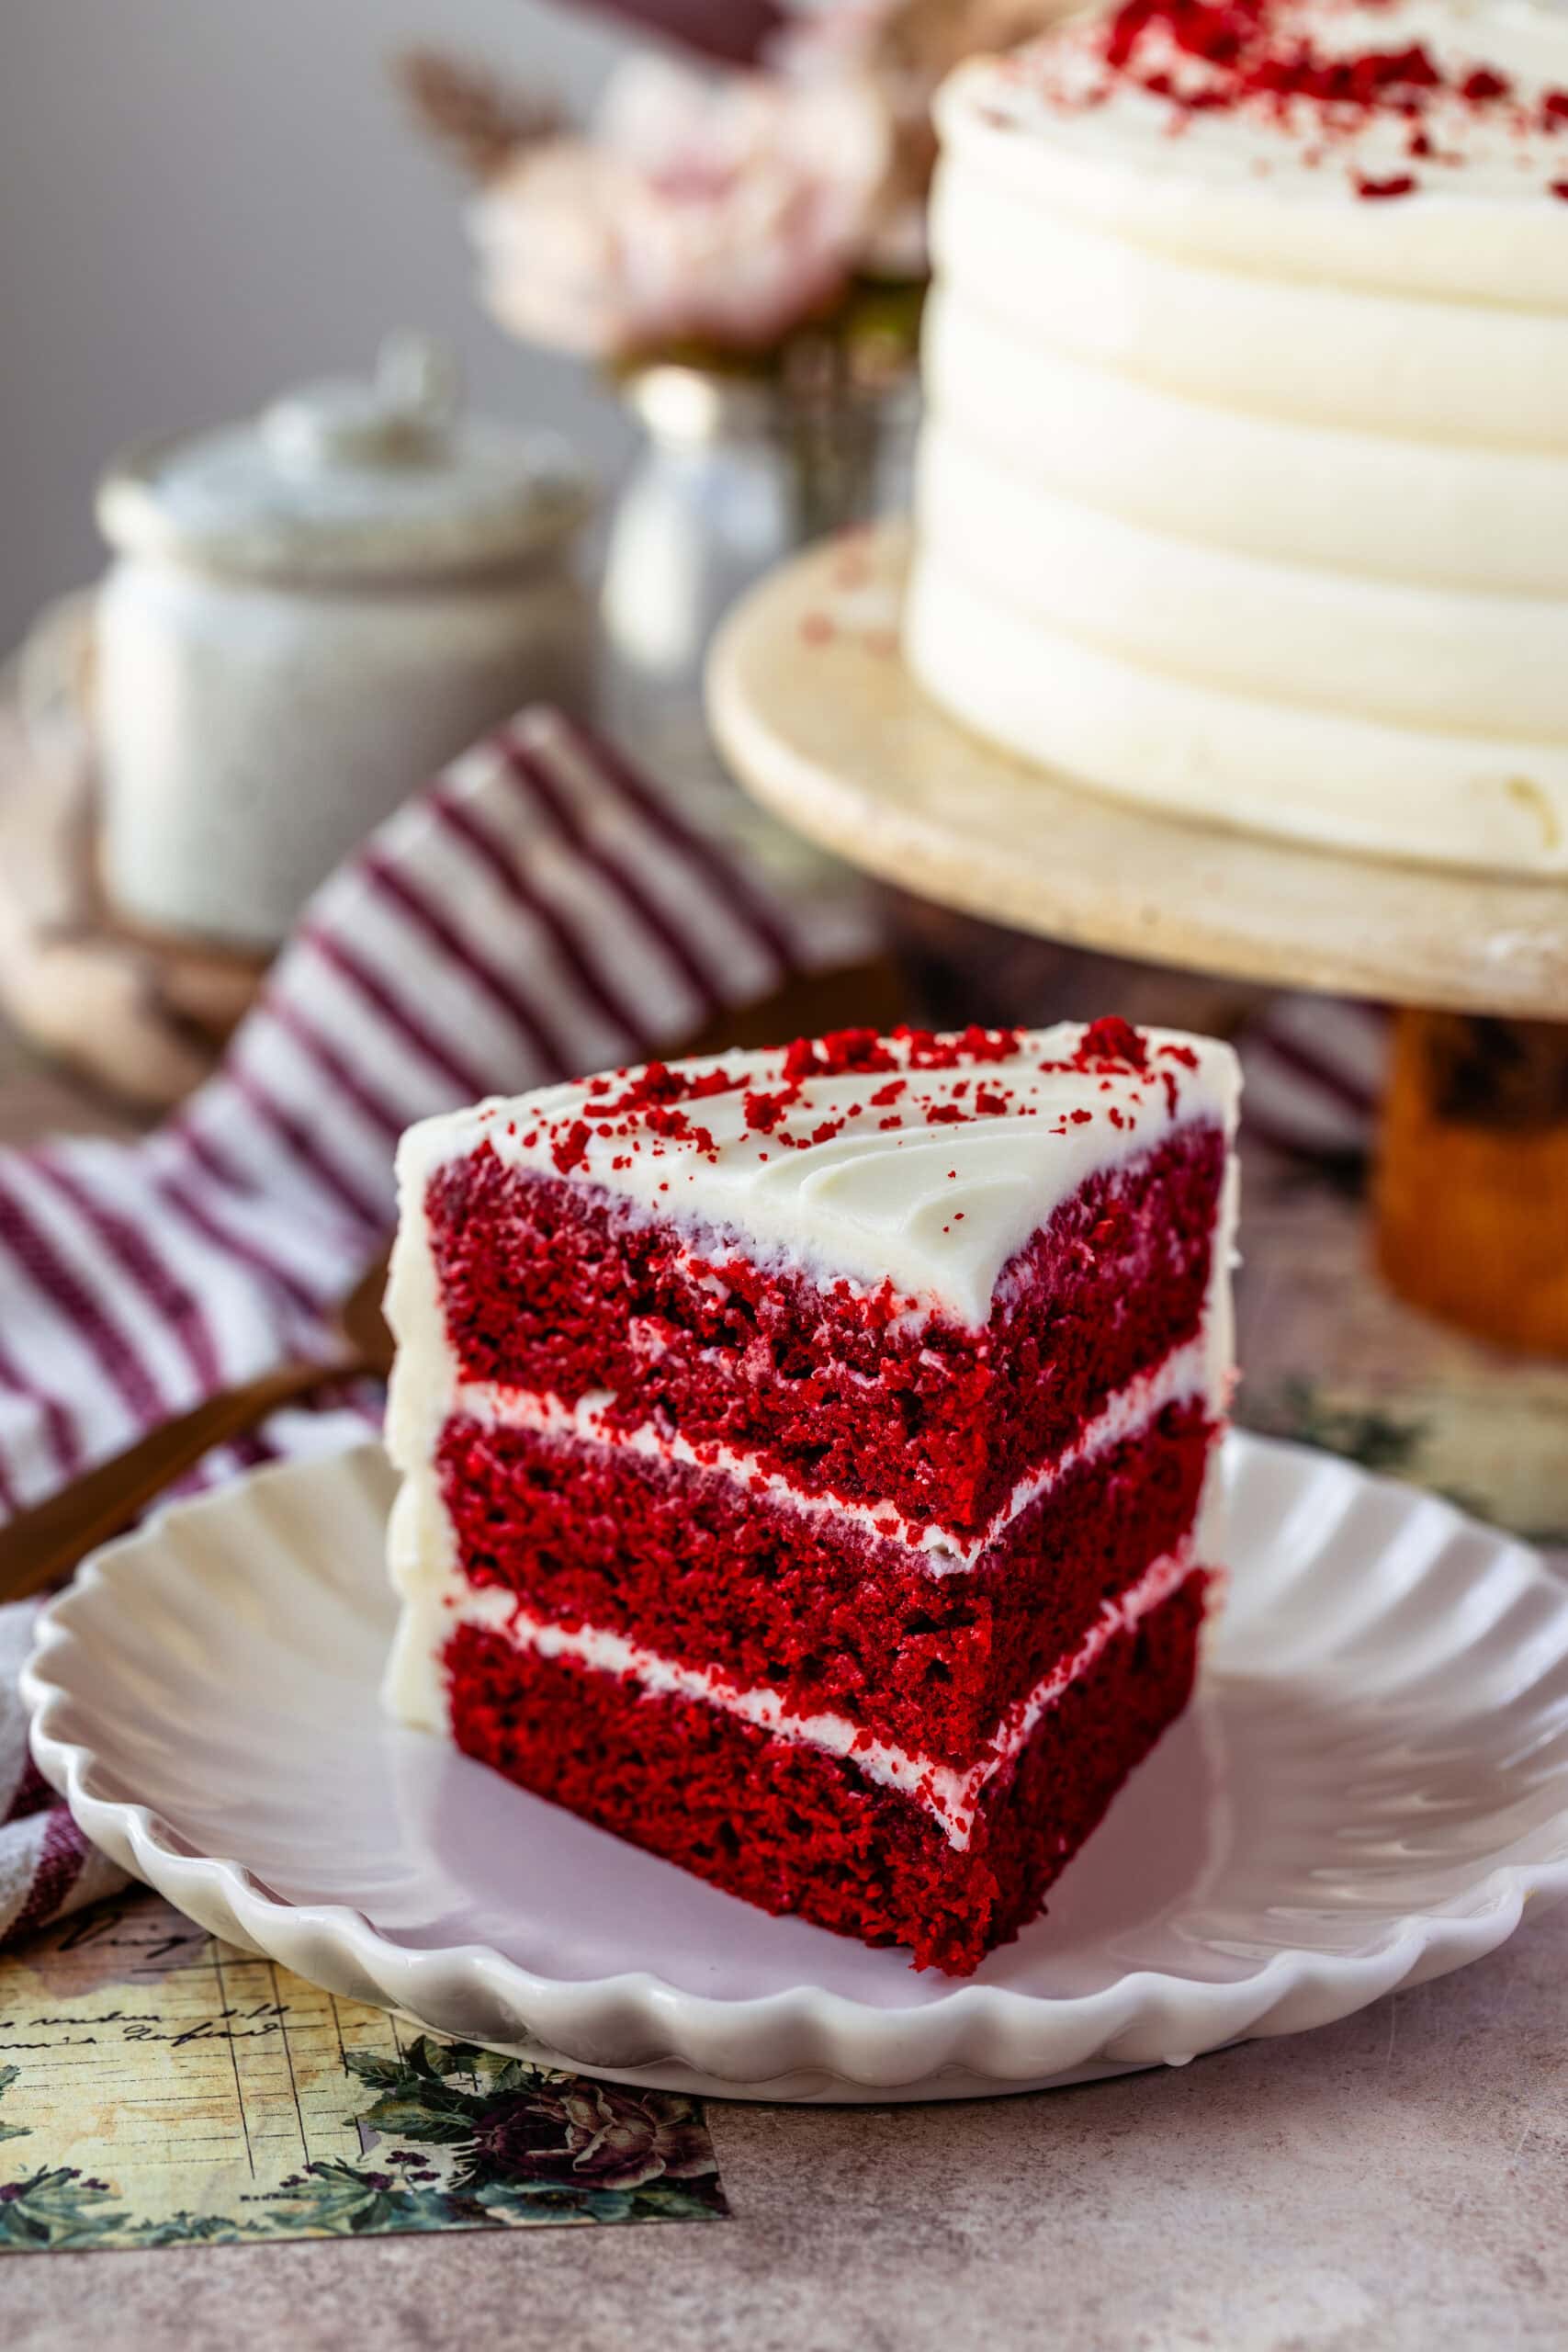
Once the cakes are fully cooled, level them with a serrated knife if needed. Place the first layer on a cake plate or turntable and spread about 3/4 cup of frosting evenly over the top. Repeat with the second and third layers. Apply a thin crumb coat of frosting around the sides of the cake and on top to seal in any loose crumbs, then cover and chill for 15 to 30 minutes.
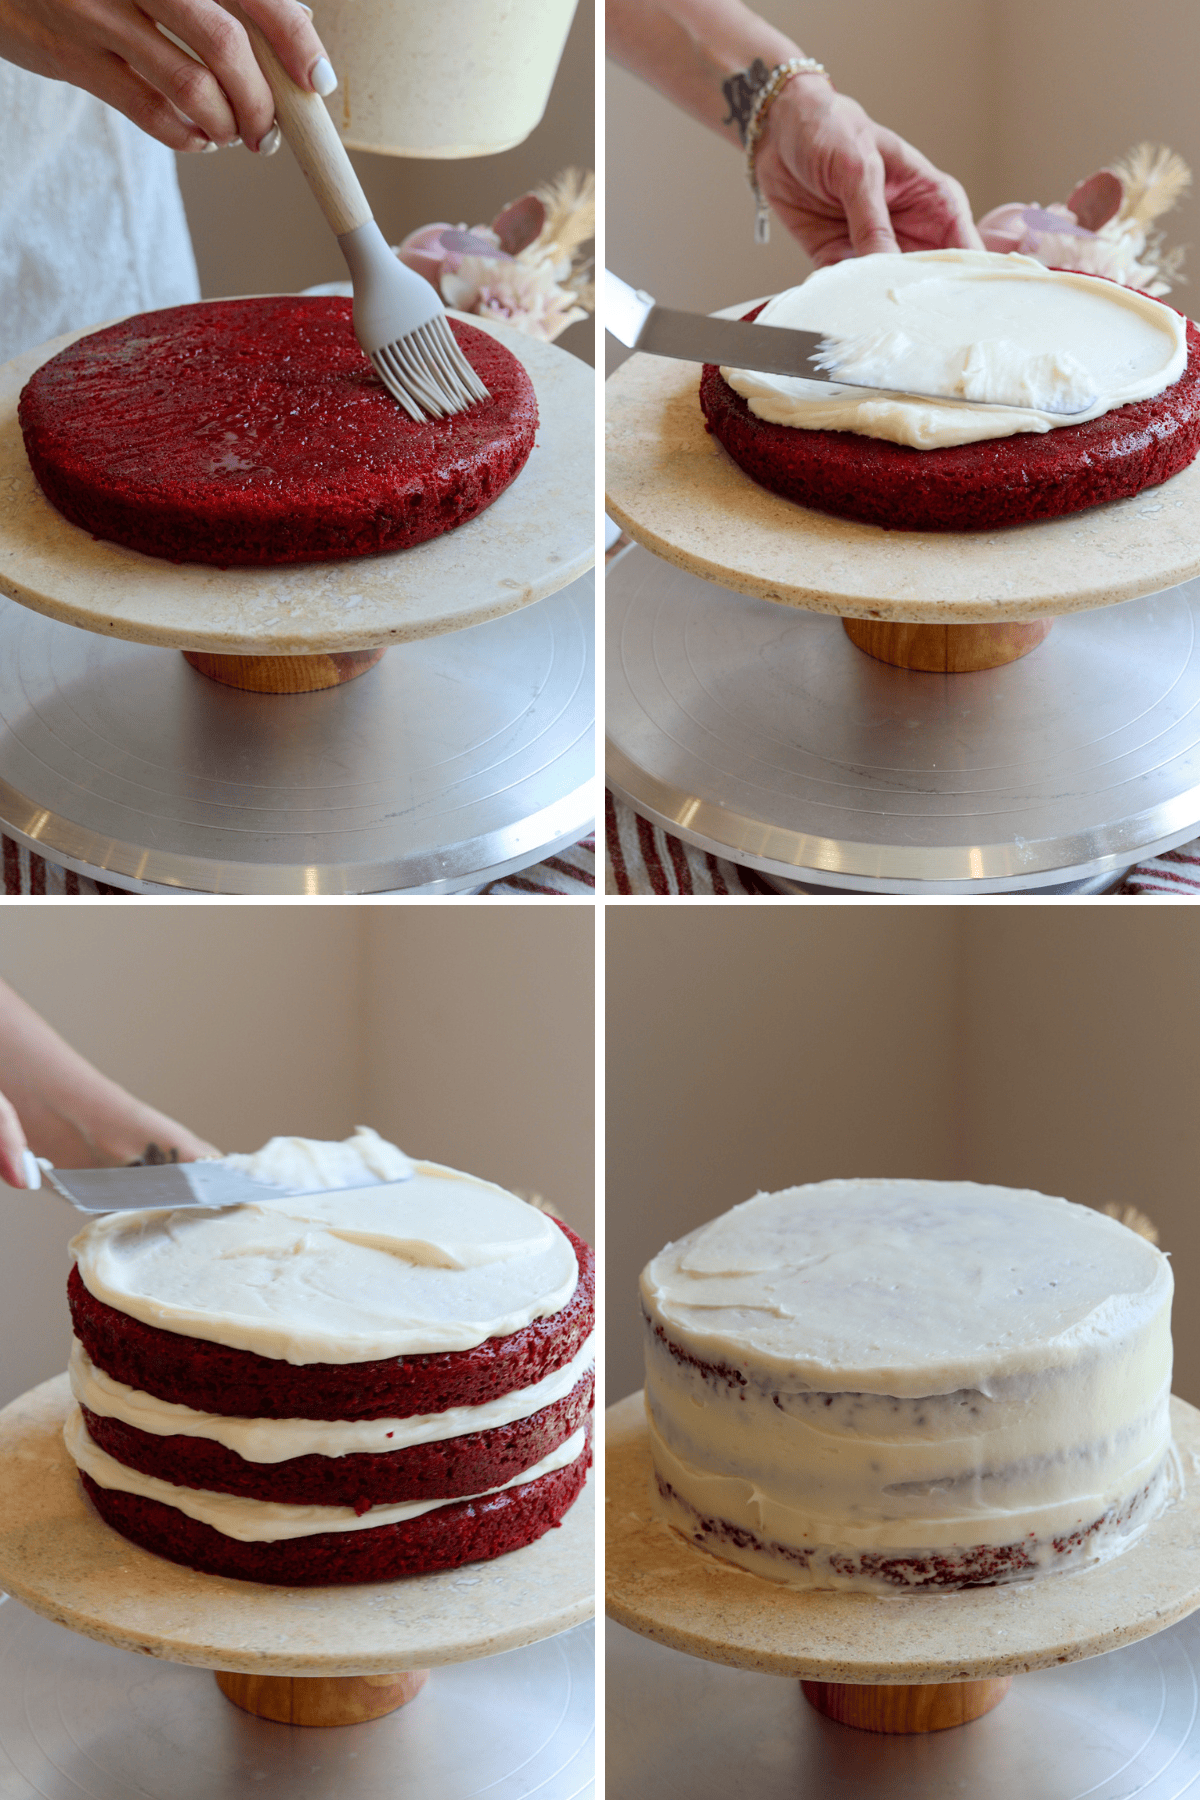
After chilling, frost the cake with a thicker, final layer, using a bench scraper or offset spatula to smooth the sides and top for a clean finish. If you saved any cake scraps from leveling the layers, crumble them and bake at 200°F for about 40 minutes to dry them out, then sprinkle the crumbs over the top of the frosted cake. Chill the cake for at least 1 hour before slicing and serving.

Storage
Store the assembled cake in the refrigerator in an airtight container, for up to 4 to 5 days. The cream cheese frosting keeps it moist and flavorful. For longer storage, freeze the individual cake layers wrapped tightly in plastic wrap.
Tips & Tricks for Red Velvet Cake
- Use gel food coloring for a deep, vibrant red without thinning the batter.
- Natural cocoa powder is essential; Dutch-process cocoa won’t react properly with the vinegar and baking soda.
- Keep frosting cool and firm while decorating to prevent sliding layers.
- A turntable and offset spatula make it easier to achieve smooth, even frosting.
- If not assembling the cake immediately, freeze the layers to preserve moisture.
Variations
- Make a naked cake by using less frosting on the sides for a rustic look.
- Use the batter for cupcakes—bake for 18–20 minutes until a toothpick comes out clean.
- Add a splash of orange zest or espresso powder for a subtle flavor twist.
- Turn these into Red Velvet Cupcakes. Prepare and whisk the batter exactly as written in the recipe. Line a standard muffin tin with cupcake liners and fill each about two-thirds full with batter. Bake the cupcakes in a preheated 350°F (175°C) oven for 18 to 20 minutes, or until a toothpick inserted in the center comes out clean. Let them cool in the pan for about 5 minutes before transferring to a wire rack to cool completely. Once cooled, pipe or spread the cream cheese frosting on top. This recipe yields approximately 24 to 26 cupcakes.
Similar Recipes
Let Me Know If You Make It
If you bake this Red Velvet Cake, I’d love to see how it turns out! Tag me on Instagram to share your creations.
Red Velvet Cake
Ingredients
Red Velvet Cake Batter
- 2½ cups all-purpose flour 318g
- 2 tbsp unsweetened cocoa powder (not Dutch-process) 15g
- 1 tsp baking soda
- ½ tsp salt
- 1½ cups granulated sugar 300g
- ½ cup light brown sugar 110g
- 1 cup unsalted butter, softened 226g
- 3 large eggs room temperature
- 1 cup buttermilk 240ml, room temperature
- 2 tsp vanilla extract
- 1 tbsp white vinegar
- 1 tbsp red gel food coloring
Cream Cheese Frosting
- 1½ cups unsalted butter, softened 340g
- 16 oz full-fat cream cheese, softened 454g
- 5 –6 cups 625-750g powdered sugar, sifted
- 2 tsp vanilla extract
- pinch of salt
Instructions
- Preheat oven to 350°F (175°C). Grease and line three 8-inch cake pans with parchment.
- In a medium bowl, sift together flour, cocoa, baking soda, and salt.
- In a large bowl or stand mixer, cream butter and both sugars on medium-high speed until light and fluffy (3–4 min).
- Add the eggs one at a time, beating well after each addition.
- Mix in the vanilla, vinegar, and red food coloring.
- On low speed, alternate adding dry ingredients and buttermilk: ⅓ flour mix followed by ½ buttermilk, then another ⅓ flour, the remaining buttermilk , and finally the remaining flour.
- Mix just until combined. Do not overmix.
- Divide batter evenly between pans. Tap each pan on the counter to release bubbles.
- Bake 25–30 min, or until a toothpick comes out clean from the center.
- Cool in pans 10 min, then turn out onto racks to cool completely.
Cream Cheese Frosting
- Beat butter alone until light and fluffy (2–3 min).
- Add the cream cheese and and beat until smooth.
- Gradually add powdered sugar, 1 cup at a time, until 5 cups have been added. Continue to add more only if needed for the consistency. If the frosting is too soft, you add more powdered sugar. If the frosting is too stiff, add milk or heavy cream only 1 tsp at a time, mixing until you achieve the proper consistency.
To Assemble
- Level cakes if needed.
- Place a cake layer on a cake plate.
- Spread about ¾ cup frosting on the cake. Then, place a cake layer on top.
- Repeat with the remaining cake.
- Spread a thin layer of frosting around the sides and on top of the cake. Smooth it out. Cover the frosting with plastic so it doesn’t dry out.
- Chill the cake for 15–30 min.
- Remove from the fridge and apply a thicker layer of frosting over the cake, using a bench scraper or offset spatula to smooth it out.
- When I leveled the cakes, I saved the crumbs, then I sprinkled them on top of the cake. The crumbs were very soft and moist, so I had to dry them out in the 200F oven for about 40 minutes in order to be able to make lose crumbs.
- Place the cake in the fridge for at least 1 hour before slicing and serving.
Hi. It is unclear in the cream cheese frosting instructions as to when to add the vanilla and pinch of salt. I assume you add it after the confectioners sugar?
Thank you!
Hello
Is there any way that I can make this cake without buttermilk? It’s hard to find where i live so I was wondering if there were any possible substitutes.
You can mix 1 tsp of vinegar with the same amount of milk, let it sit for 5 min and use that instead of the buttermilk.
I made the cake but all the layers sank in the center. What could have happened?
All the ingredients are brand new.
I am from Ecuador ❤️
Things that could have happened:
-The pan was too small (this was made on a 8″)
-Opening the door of the oven too many times during baking
-Removing the cake from the oven before it was done baking through
Do you think any of these could have been the reason? send me a photo of the cakes to camila @ piesandtacos. com (sorry I have to write it spaced out here) but seeing the photo will be helpful to be able to tell what could have been the issue.
Hello Camila,
If I plan to freeze the cake before applying the frosting, does it make sense to let it thaw first or use the frosting directly on the frozen cake?
Also, would the cake be wet when it thaws?
I prefer letting the cake sit on the counter for about 10 minutes before frosting. It will begin to soften pretty quickly, this way it isn’t too stiff. Do you mean wet like dripping water or moist? No, it won’t be wet like dripping water. And if the question is about moisture, freezing is the best way to preserve cake’s moisture. The cake will be moist and won’t be wet. You’ll be fine. I always always freeze my layers.
🙂
Dearest Camila,
I plan on baking that cake for my daughter’s first birthday. So today was my first try. Unfortunately, I feel like the cake layers didn’t rise at all, even though I was using baking soda as instructed. Should I try using baking powder instead? Other than that, the cake tastes and turned out wonderfully.
Hi, Lara! That’s so exciting you’re making this cake for your daughter’s first birthday! If the cake layers didn’t rise, two things could be at play. First, I’d test your baking soda to make sure it’s still active. Just add a pinch to a little vinegar or lemon juice and it should bubble right away. If it doesn’t fizz, it’s time to replace it. Second, what size pans did you use? If the batter was spread too thin in larger pans, that can make the cake look flat even if it baked correctly.
I’m glad to hear it still tasted great. That’s the most important part! With fresh baking soda and the right pan size, the layers should rise nicely for your next try.
Thank you so much for your answer! I used brand new baking soda, but it really might be the size of my pan. I’ll try again next weekend and keep you posted 🥰
I used 8 inch pans. If you want to use 9 inch ones, you can make 1.5x the recipe, it will fit 3-9inch pans 🙂 let me know how it goes!!
Hi
I’m wanting to use this recipe for a 11×15 inch tin, what would be the conversion please 🙂
I’m not sure, but I’d try to make the just one batch and bake it in the tin.